 Go back
Walkthrough for Graven: The Purple Moon Prophecy
General Tips
- This is the official guide for Graven: The Purple Moon Prophecy.
- It includes solutions for all hidden object (HO) scenes.
- It doesn't include solutions for mini games or mistletoe placements.
- If you notice any errors - please let us know.
Chapter shortcuts
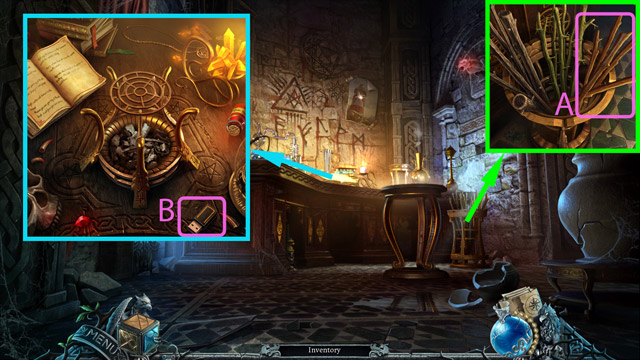
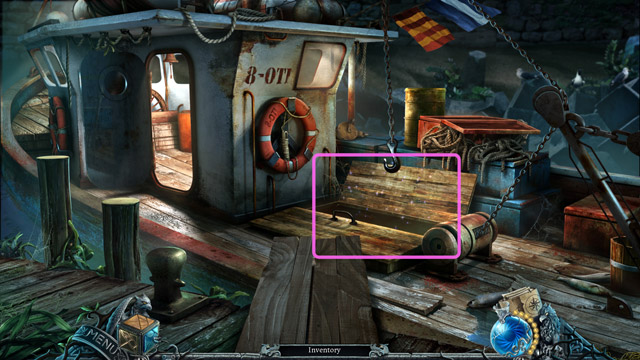
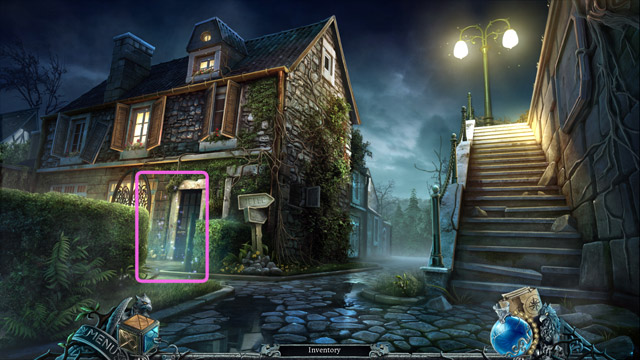
Chapter 1: Night of the comet
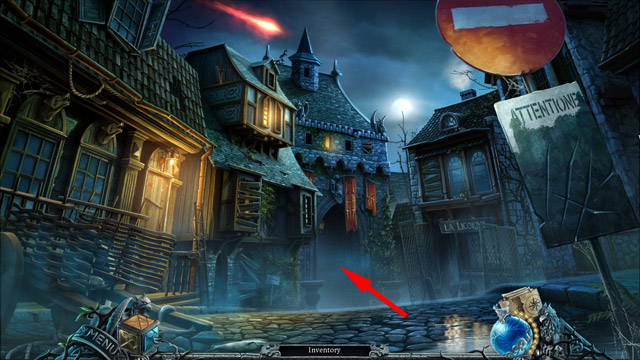
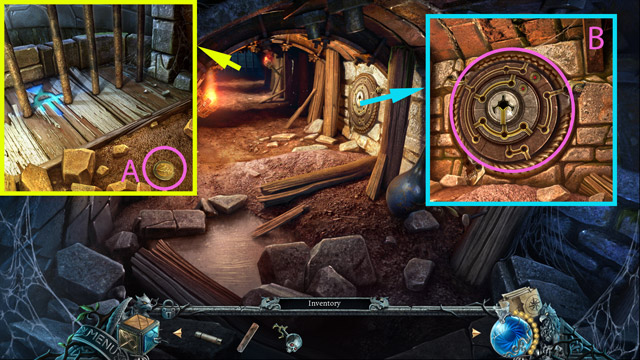
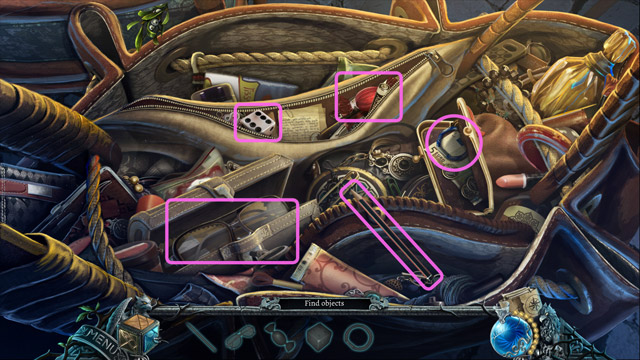
- Go into the alley.
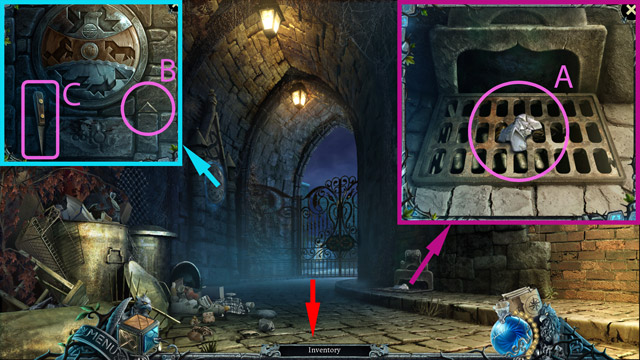
- Read the note (A).
- Pick up the first piece of mosaic (B).
- Take the Broken knife (C).
- Back to the street.
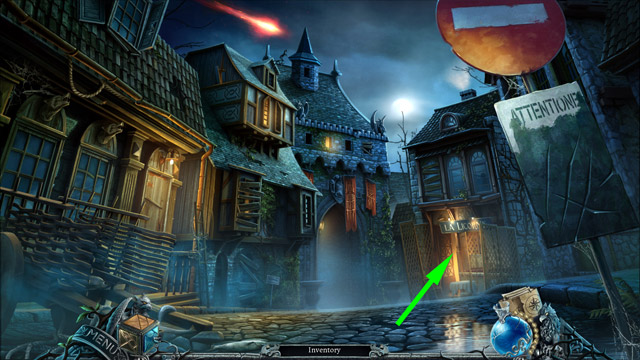
- Notice the pub's lights just turned on. Go there.
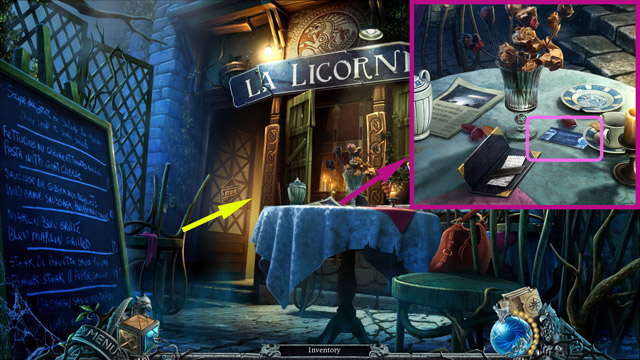
- Look at the papers on the table and take the Business card with the code.
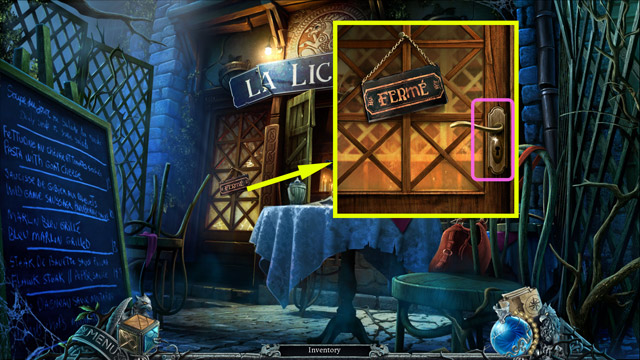
- Go inside the pub.
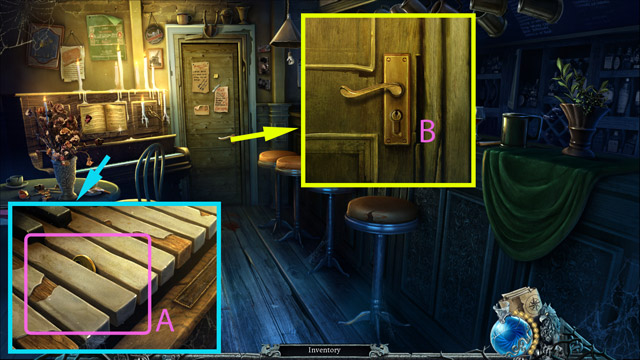
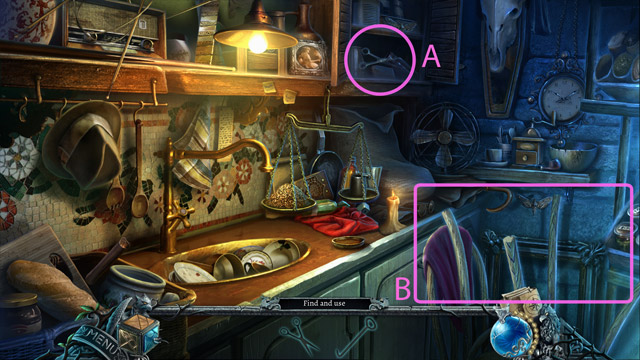
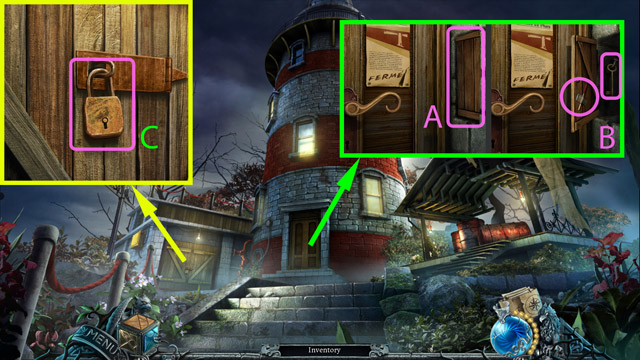
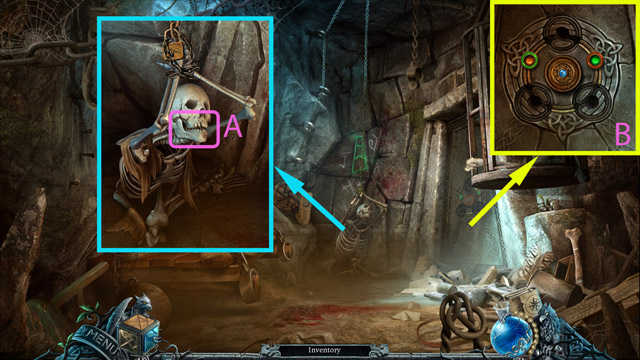
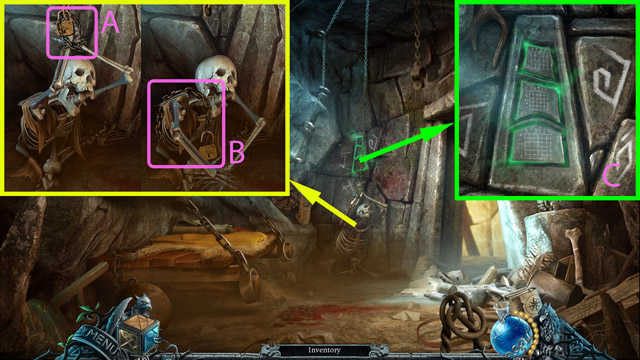
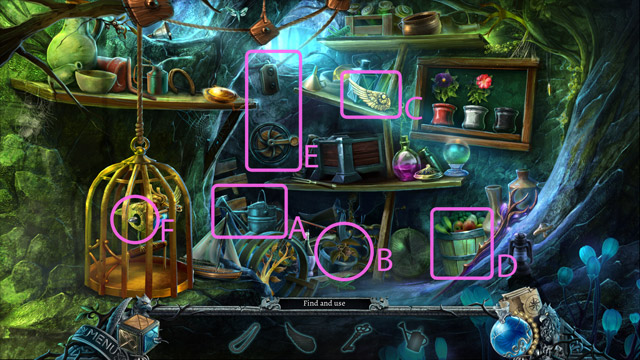
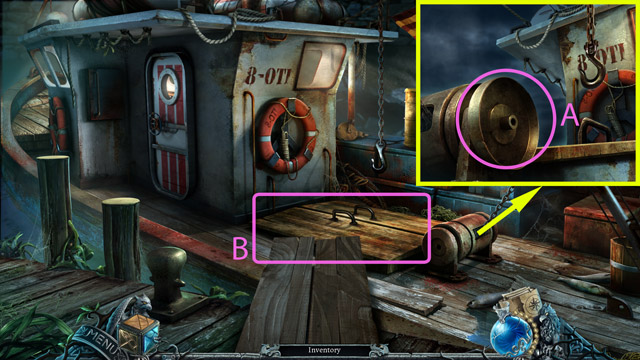
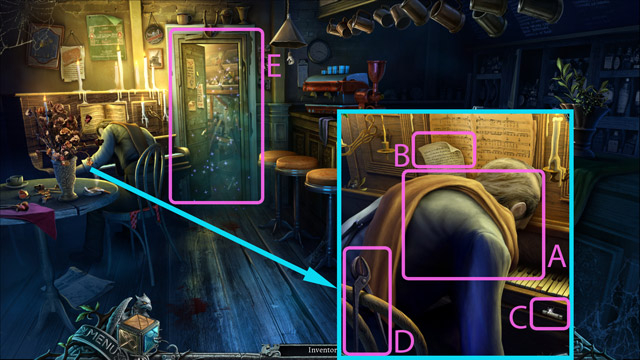
- Use the Broken knife to take out the mysterious item from the piano (A)
- Pick up the Key
- Use the Key to open the door lock (B) and press the handle.
- Go inside.
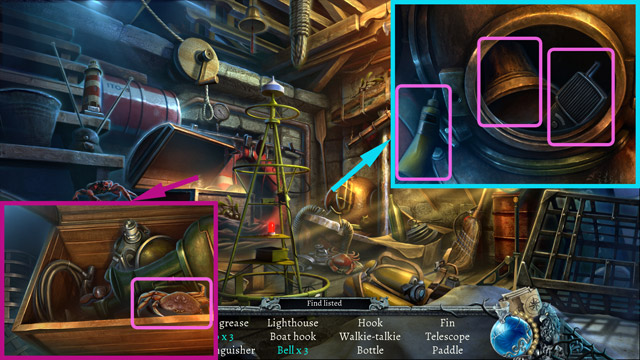
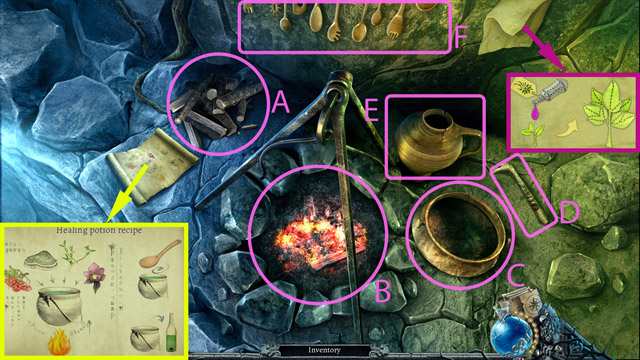
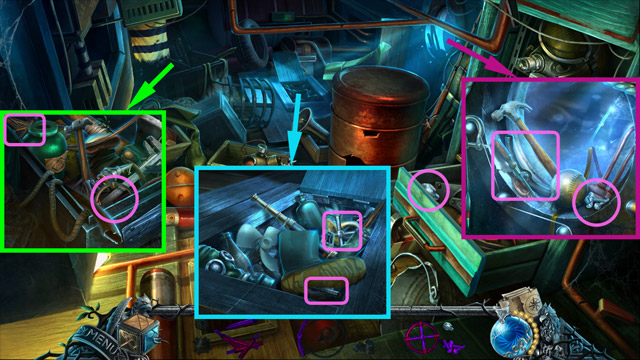
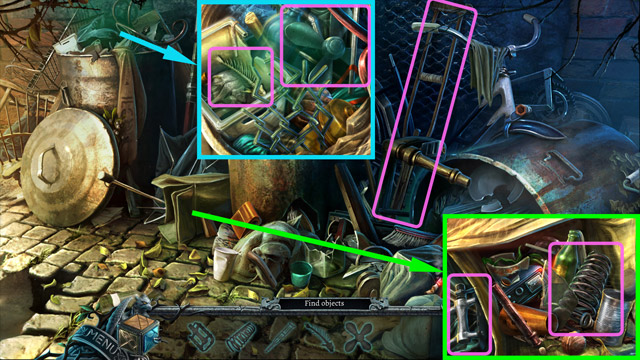
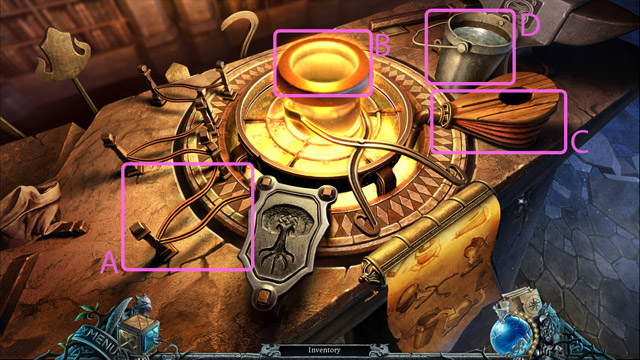
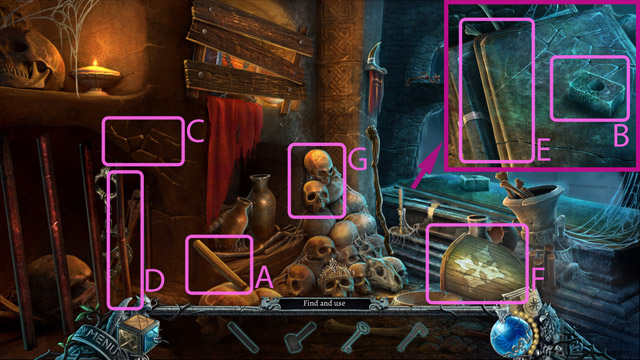
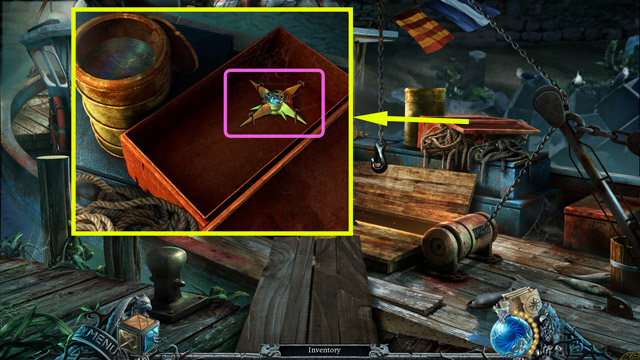
- Open the jar (A) and then take the Tap
- Pick up the First horn (B)
- Pick up the Bulb (C)
- Insert the Bulb into the lamp (D)
- Pick up the Second horn (A)
- Insert the First horn and the Second horn into the skull on the wall (B)
- Move everything in the cabinet (C) to the side and take the Weight
- Install the Tap in the sink (D)
- Drain the water from the sink (E)
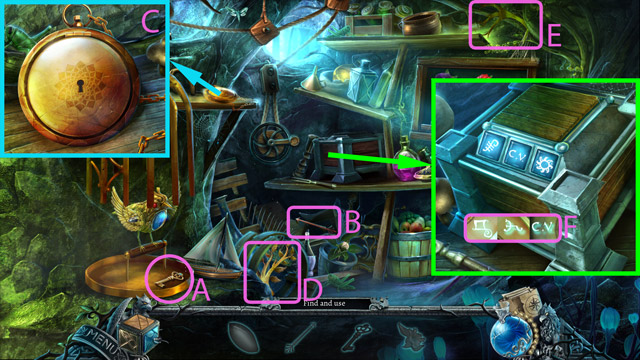
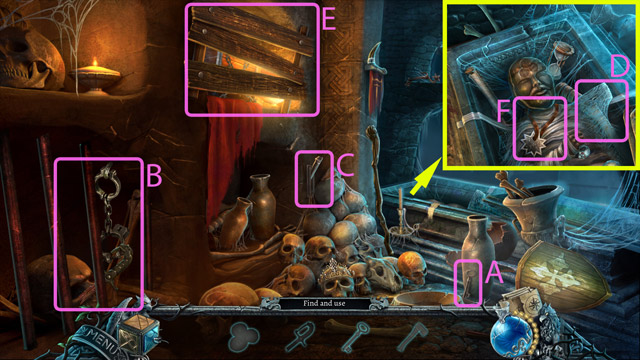
- Put the Weight on the scales (A), and pick up the Handle
- Combine the Handle with the corkscrew part (B), then pick up the Corkscrew
- Open the jar (C) with the Corkscrew and pick up the Keys
- Open the padlock (D) with the Keys and then open the cupboard.
- Pick up the Scissors (A)
- Move the chair (B) and cut the rope with the Scissors
- Open the bottom cupboard.
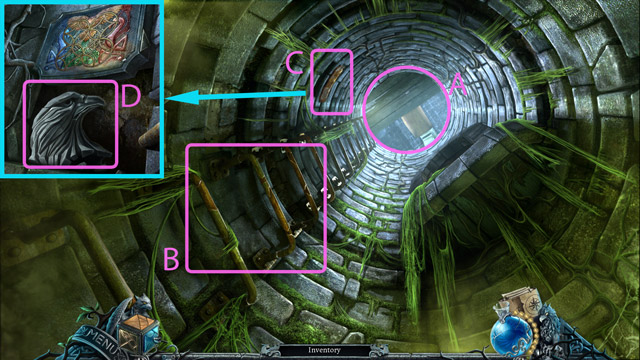
- Pick up the Manhole hook.
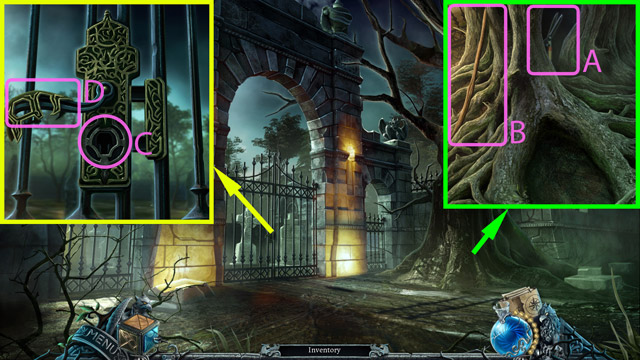
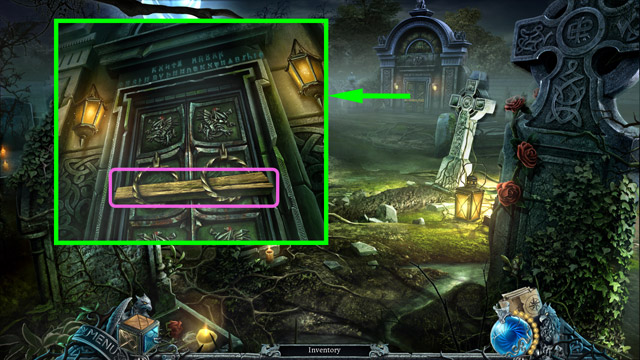
- Back to the alley.
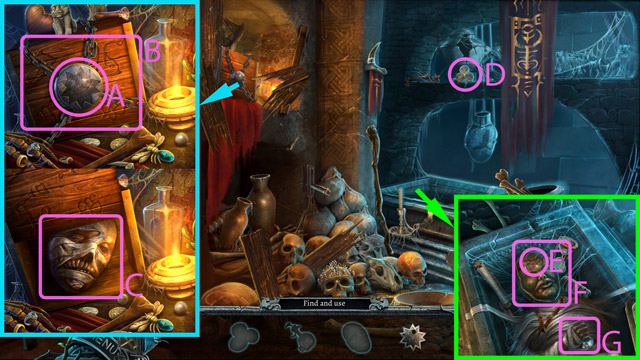
- Pull out the Handle from the basin (A) with the Manhole hook
- Insert the Handle into the hole in the gate lock (B)
- Play the minigame.
- Pick up the Coin (A)
- Pull the rope in well (B)
- Throw the Coin into the well (C)
- Pick up the Five button (D)
- Insert the Five button into the intercom keyboard (E)
- Press the correct code from the Business card: 5179
- Press the handle (F)
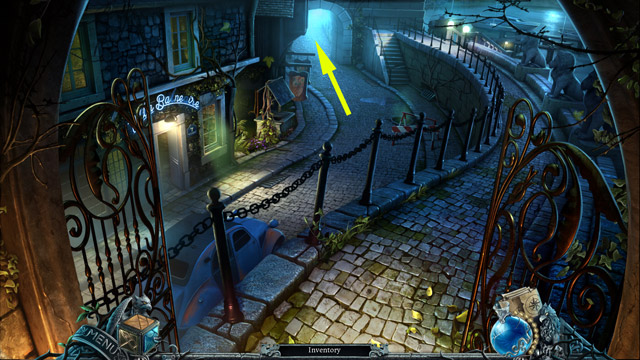
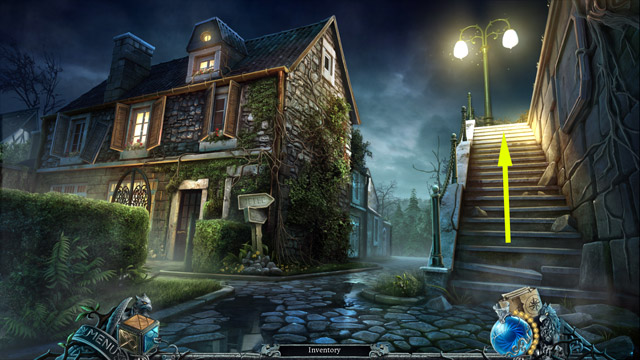
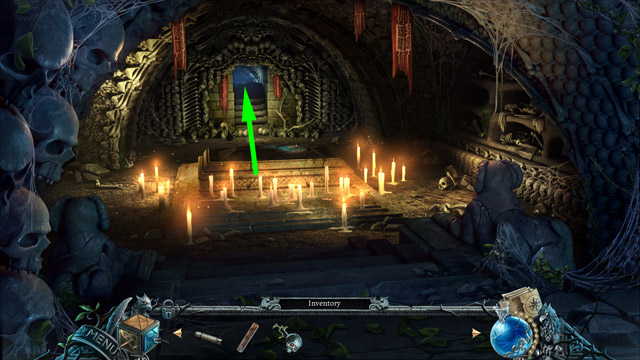
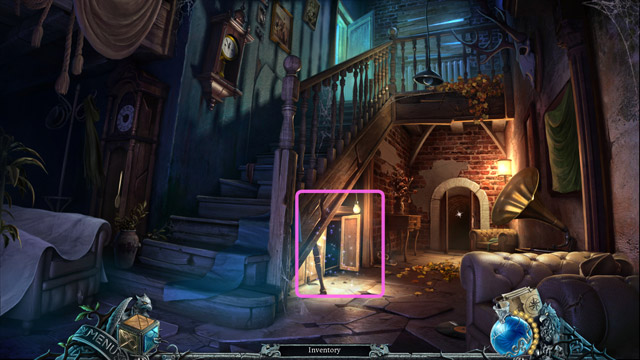
- Go inside Villa Balneaire.
- Go up the stairs to the room.
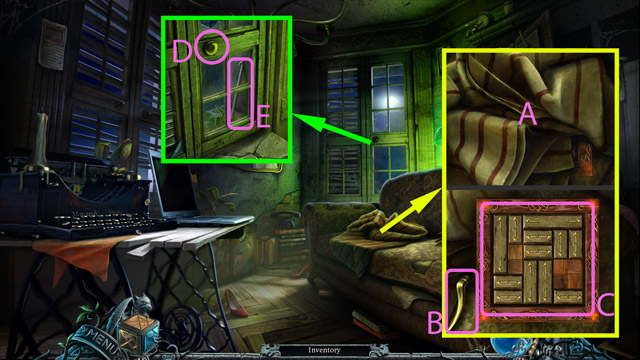
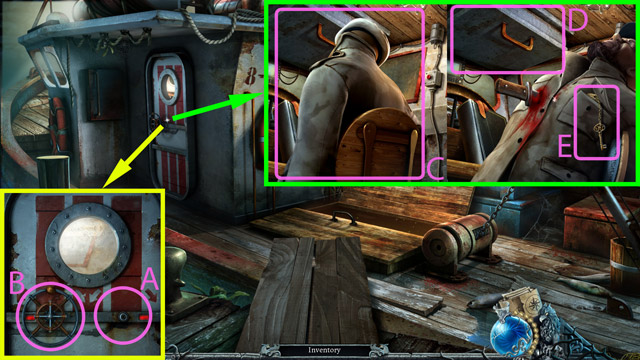
- Move the blanket on the couch (A)
- Pick up Window handle (B)
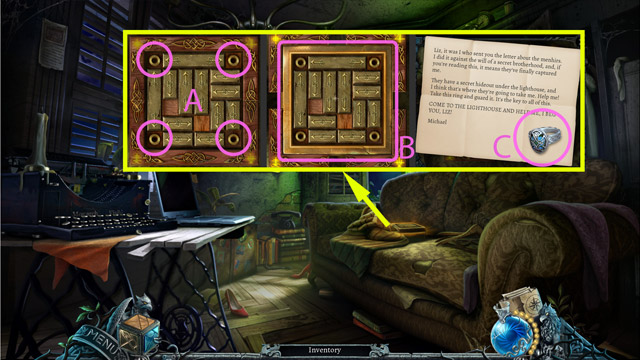
- Play the minigame (C)
- Open the window (D) with the Window handle
- Pick up the Crotchet needle (E)
- Use the Crotchet needle on every box corner (A)
- Then remove the box cover (B)
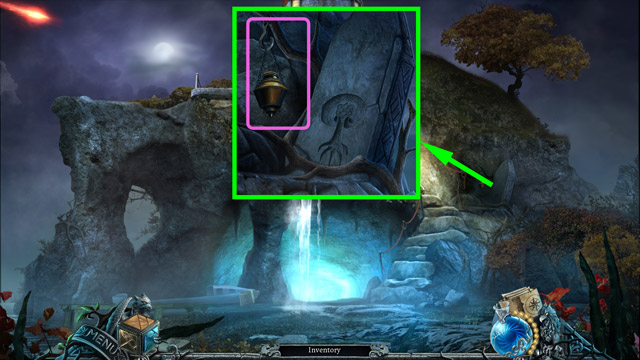
- Read Michael's message and take the Blue Ring (C)
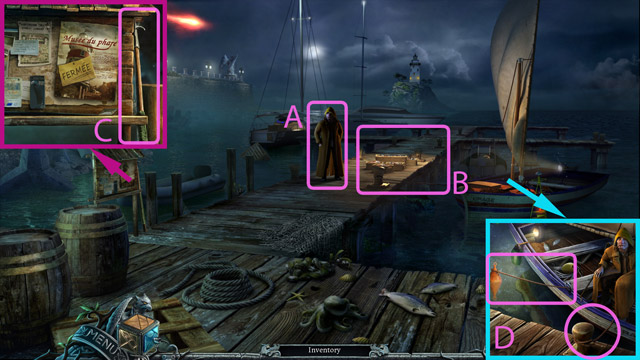
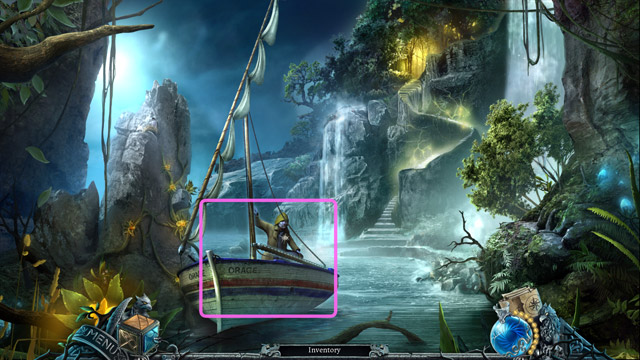
- Talk with the fisherman (A)
- Then help him segregate the catch in the minigame (B)
- Pick up the Boat hook (C)
- Untie one of the boat ropes and use the Boat hook to remove the second one from the buoy (D)
Chapter 2: Saving Michael
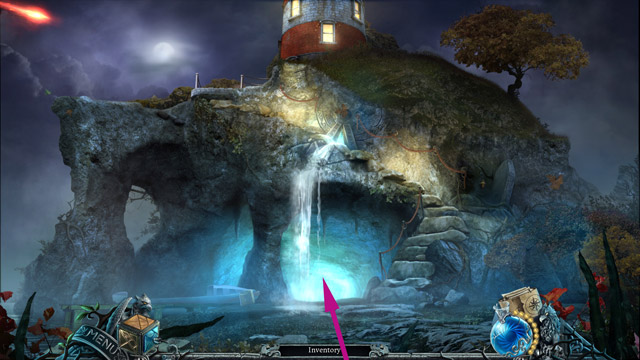
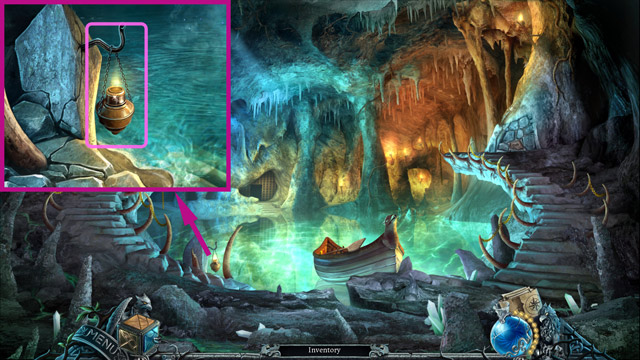
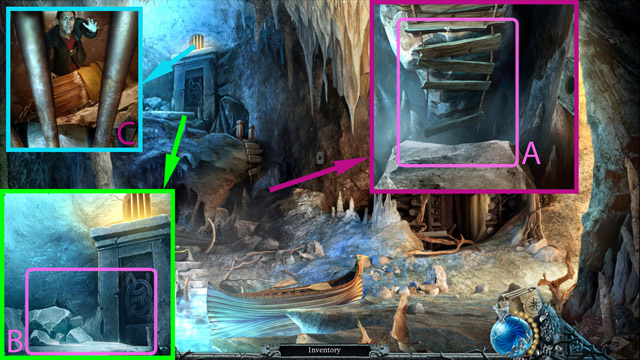
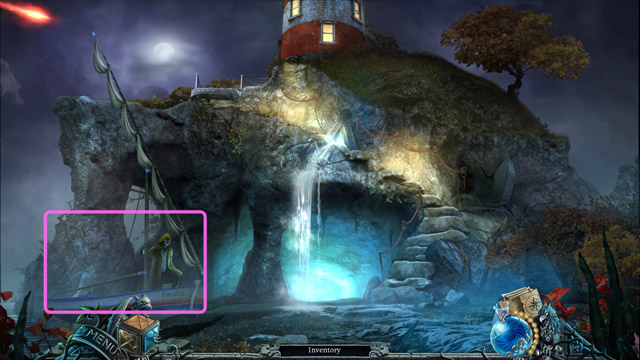
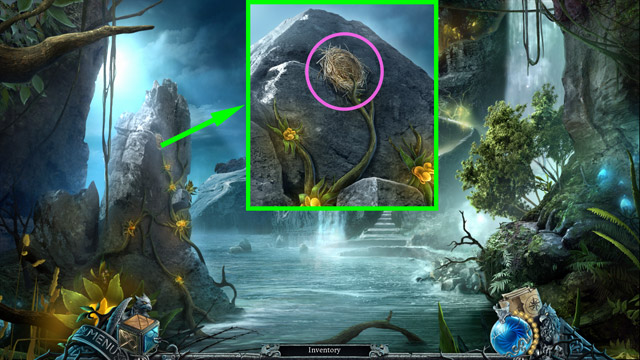
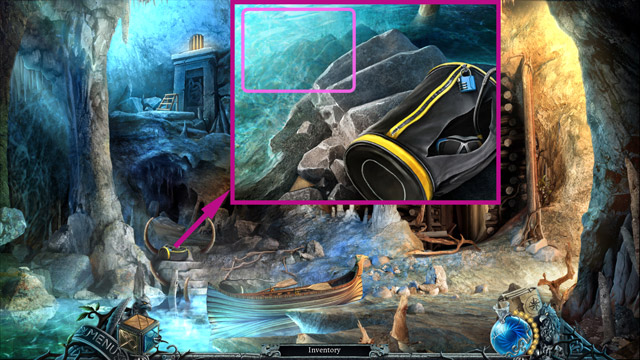
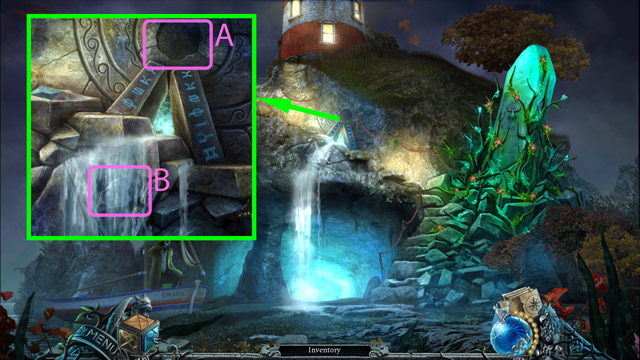
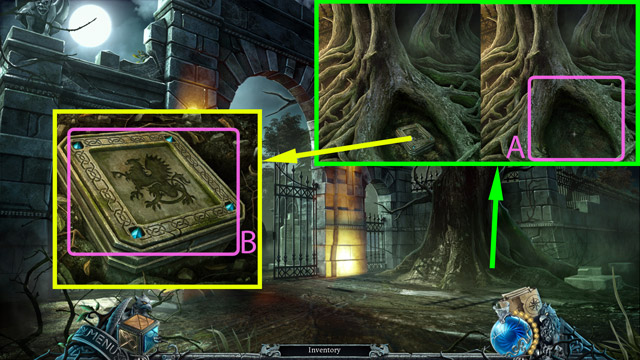
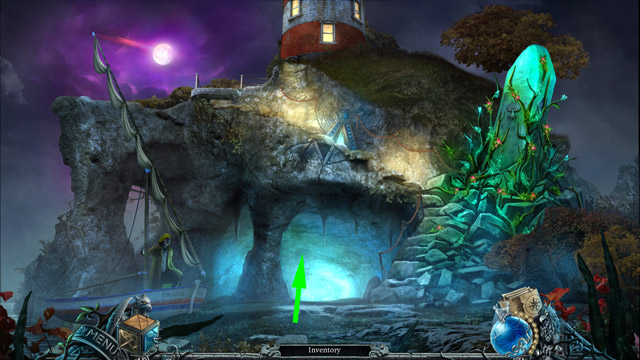
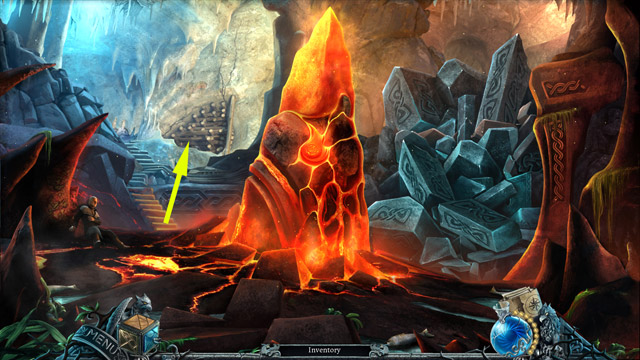
- Go into the cave.

- Pick up the Trowel
- Back to the shore, and go to the lighthouse on top.
- Open the secret safe with the Trowel (A)
- Pick up the Key and the Stormproof match (B)
- Open the padlock with the Key (C)
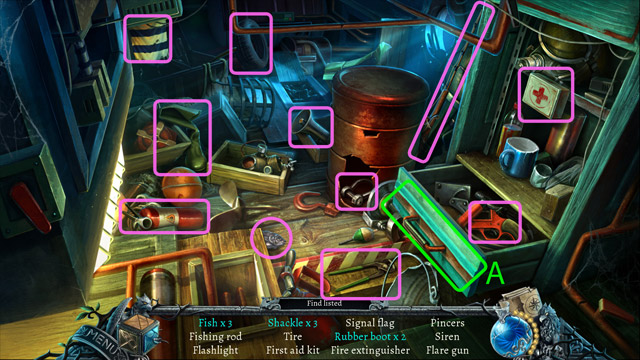
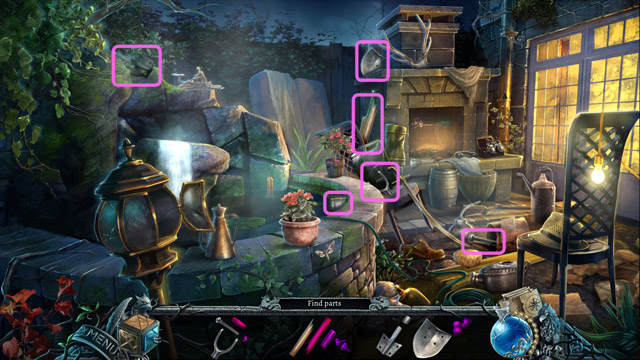
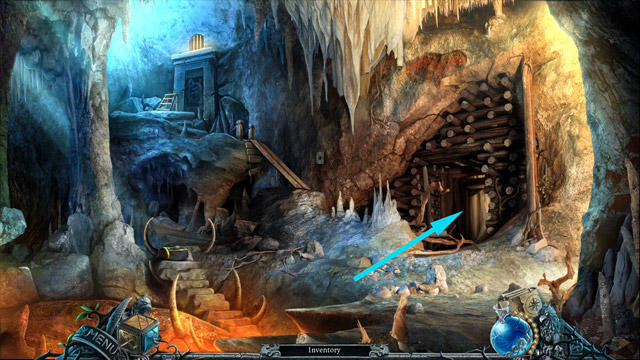
- Go into the shed.

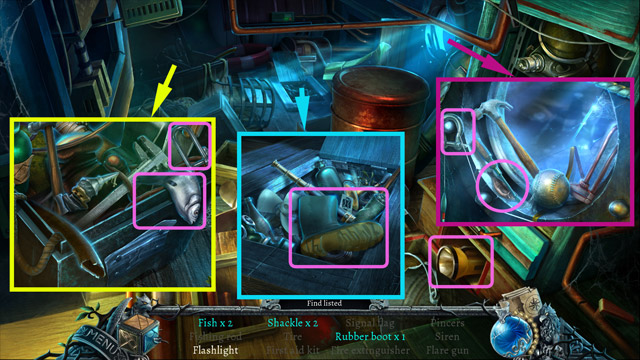
- Collect all marked items.
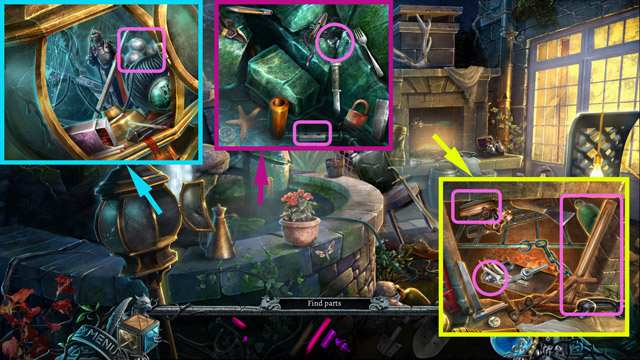
- Turn the mirror (A) and then take the rag (B) and clean the mirror (A)
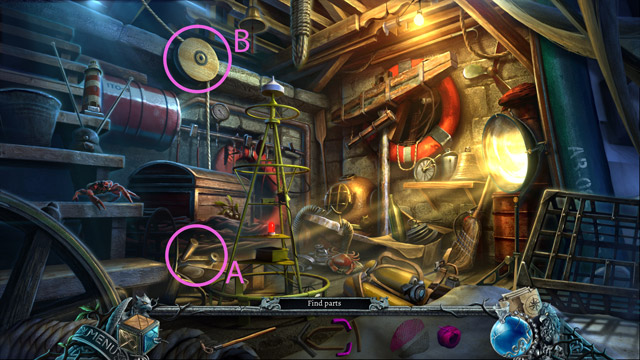
- Take the handle (A) and put it into the wheel (B) and use it.
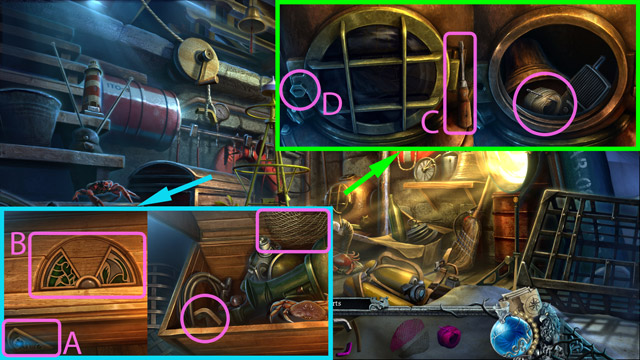
- Take the wooden part of chest lock (A) and place it in the lock (B).
- Open the chest by switching wooden parts of the lock (B).
- Pick up the marked elements inside the chest.
- Take the screwdriver (C) and use it to unscrew the helmet (D)
- Pick up the marked element inside the helmet.
- Your reward is a Fishing net.
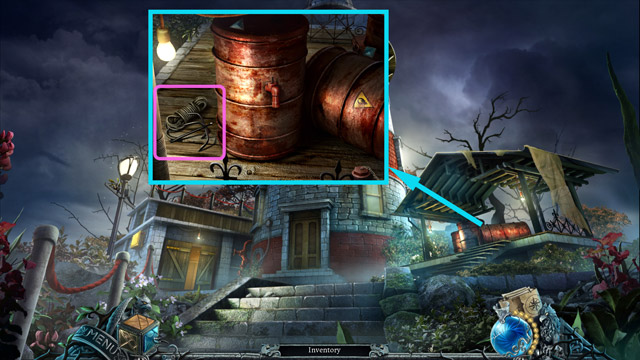
- Pick up the Grappling hook.
- Back to the shore and use the Stormproof match to light the oil lamp.
- Pick up the Oil lamp and go to the cave.
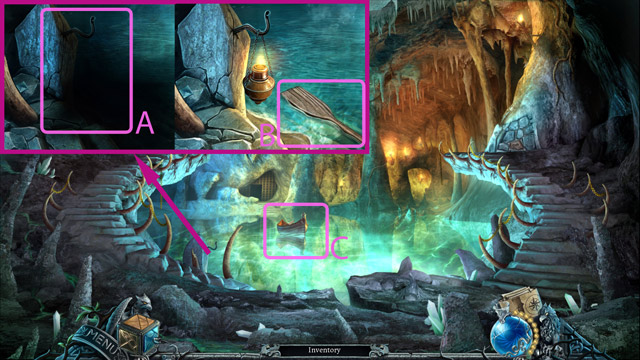
- Hang the Oil lamp on the rod (A).
- Pick up the Oar (B).
- Use the Grappling hook on the boat (C) to pull it closer.
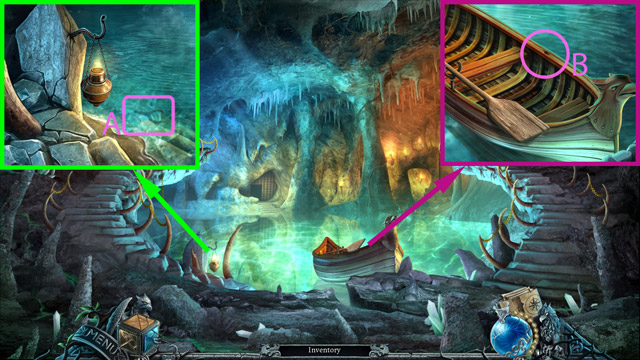
- Use the Fishing net to retrieve the Oar holder from the water (A).
- Mount the Oar holder on the boat (B).
- Place the Oar in the oar holder (B).
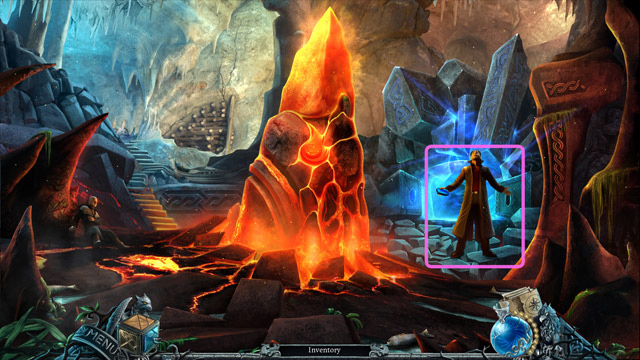
- Now you can cross the lake. So do it.
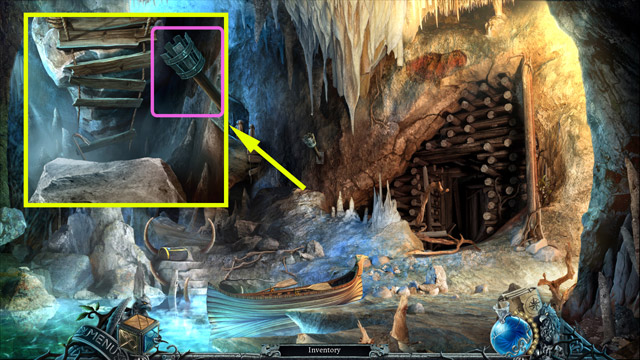
- Pick up the Torch.
- Go back to the cave.
- Light up the Torch using the oil lamp.
- Cross the lake again.
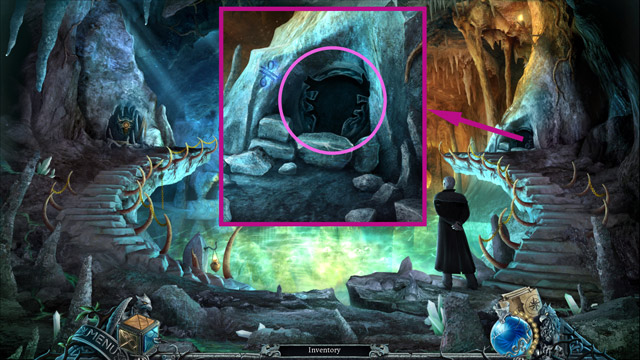
- Then go into the dark enterance.
- Light up the torch (A) using the Lit torch
- Put the Lit torch into the hole (B).
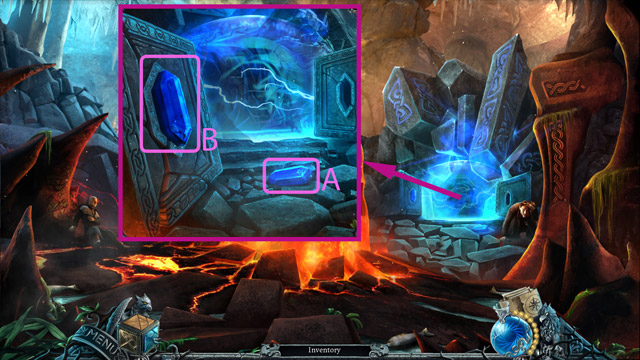
- Go to the next room.
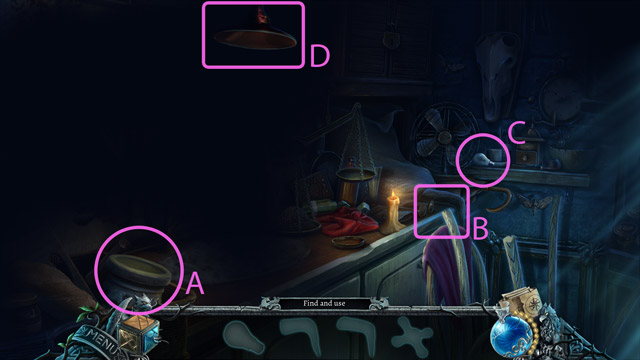
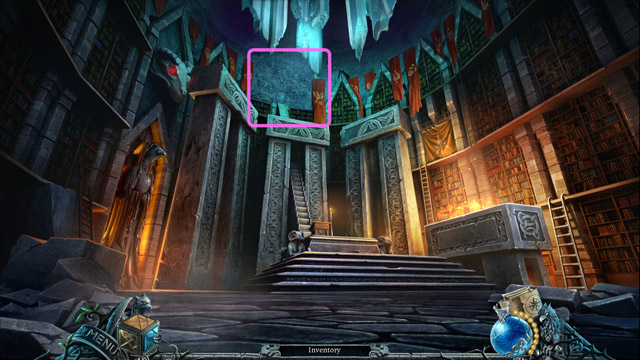
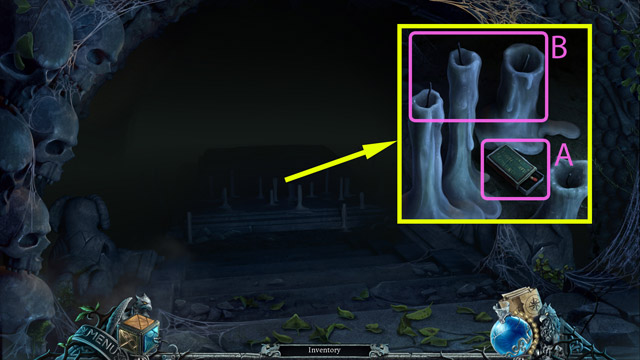
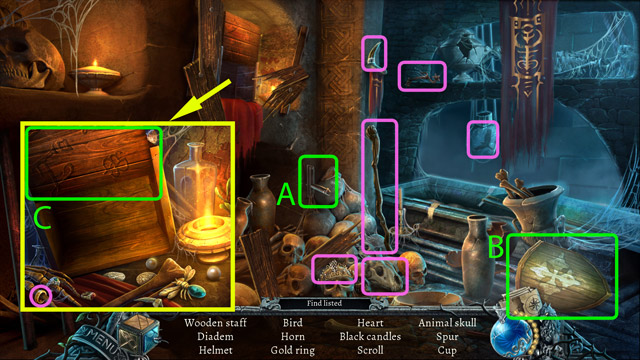
- Uncover the bookshelves (A).
- Pick up the Candle (B) and the Step stool (C)
- Look at the hearth (D) and light the Candle from it.
- Place the Lit candle on the candlestick (E).
- Pick up the Safety razor.
- Cut the bag with the Safety razor (A).
- Pick up the Rope from inside the bag.
- Get the Crowbar out of the gap (B).

- Tear off the planks using the Crowbar.
- Pick up the Planks.
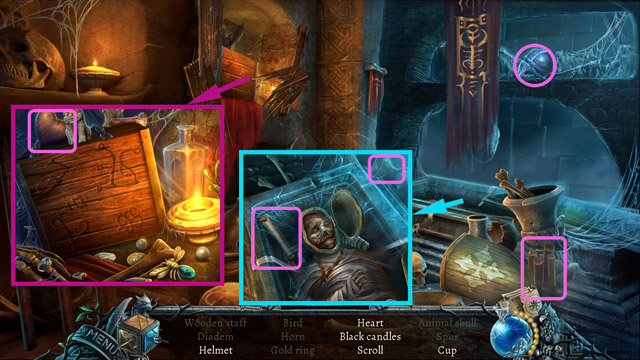
- Make a footbridge from the Planks (A).
- Place the Step stool (B).
- Talk to Michael and give him the Blue Ring (C).
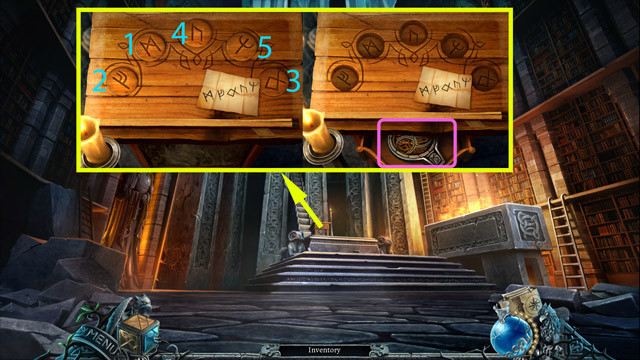
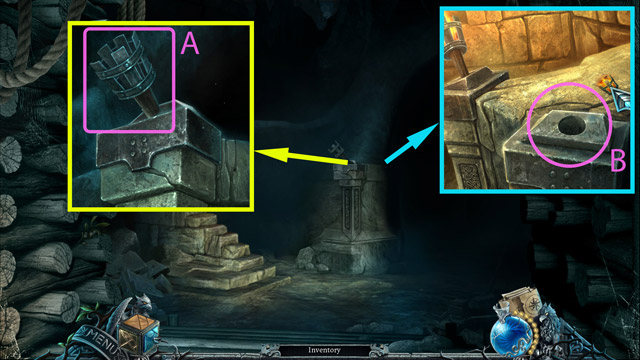
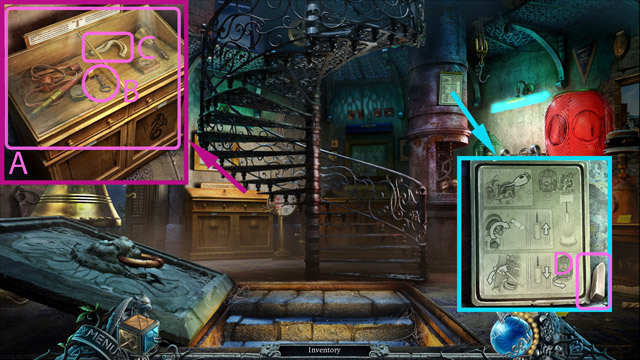
- Go back to the hall and look at the lectern.
- Press the buttons in the right order and then pick up the Device.
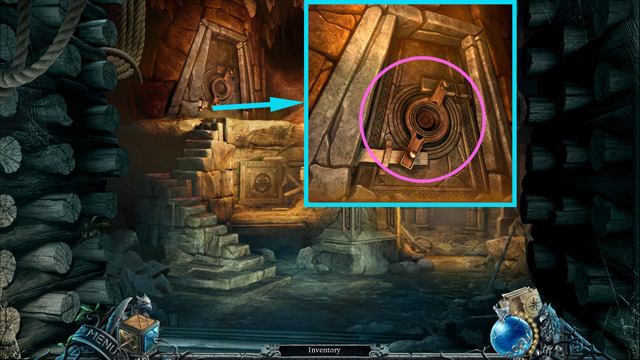
- Insert the Device to the wall mechanism.
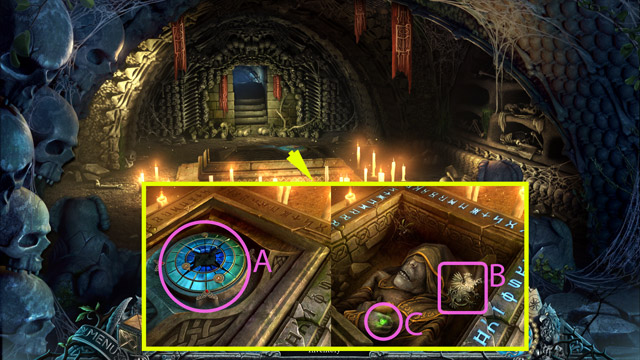
- Uncover the bed (A) and pick the Strange device.
- Pick up the Lever (B).
- Insert the Lever into the hole (C) and then pull the lever. It will uncover the second Strange device. Pick it up.
- Look at the cage (D).

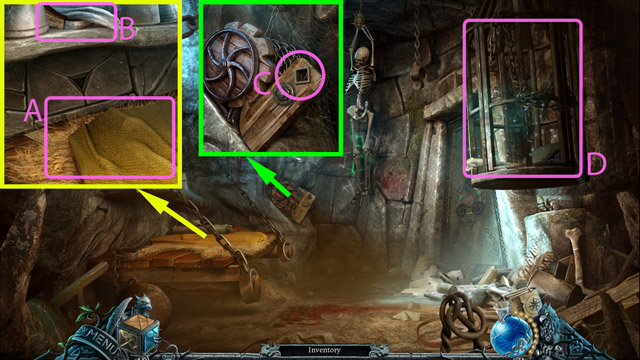
- Pick up all marked objects.
- Move the rag (A) to find a hammer.
- Take the key (B) and use it to open the handcuffs (C).
- Move the glove (D) to find a church key.
- Reward is a Church key.
- Use the Church key on the Skull (A).
- Then pick up the third Strange device that just fell out.
- Insert all three Strange devices into the door mechanism (B).
- Play the minigame.
Chapter 3: I will start the lighthouse
- Go to the hall.
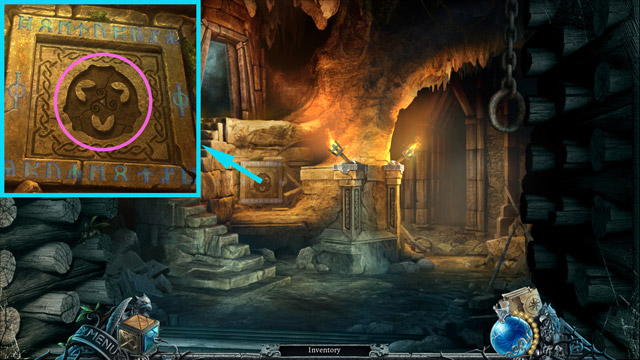
- After seeing druids meeting look at the relief at the top center of the screen.
- Play the minigame.
- Open the door lock (A).
- Press the handle (B).
- Go outside, to the lighthouse entrance.
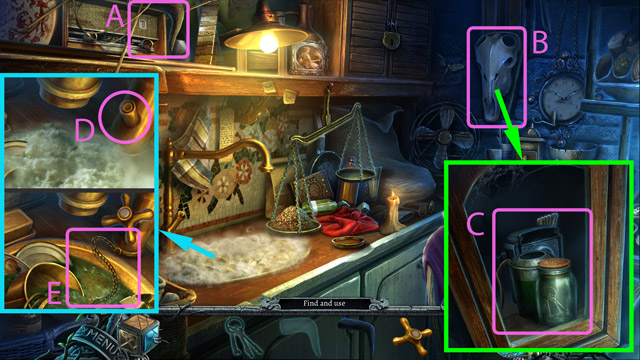
- Go inside the shed (hidden object scene).
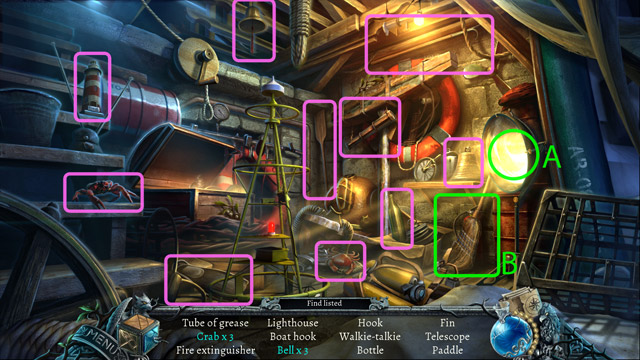
- As usual pick up all the marked objects.
- To pick up the hook turn the mirror (A).
- The extinguisher is behind the broom (B).
- Pick up the rest of the items, marked here.
- Reward is a Tube of grease.
- Go to the shore and take the Empty fuel can.

- Go back to the lighthouse and go to the top of the staircase.
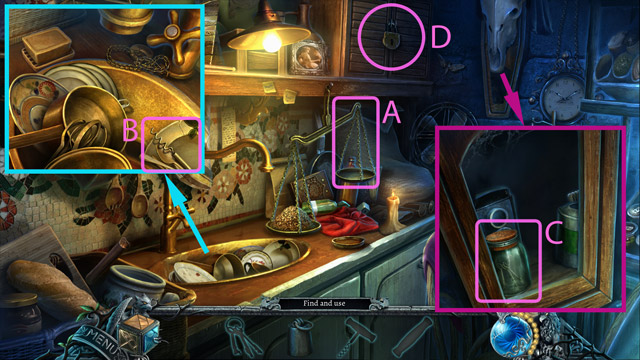
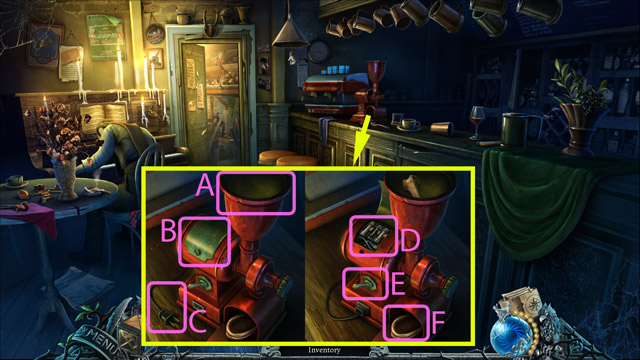
- Pick up the Emergency hammer (A) and the Tap handle (B).
- Pick up the Cutting pliers (C).
- Use the Tube of grease on the seized gears (D).
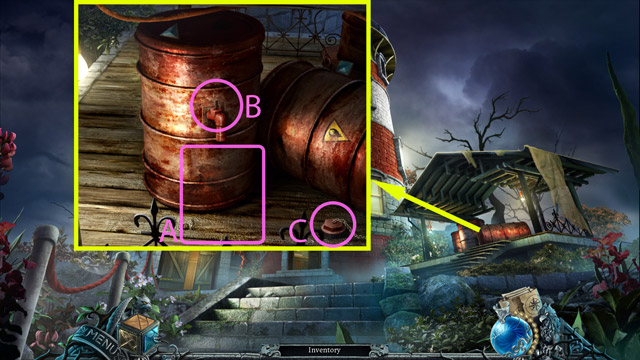
- Place the Empty fuel can at the front of the barrel (A).
- Mount the Tap handle to the tap (B).
- Turn on the tap (B).
- Pick up the Fuel can (A).
- Cut the chain using the Cutting pliers (C) then pick up the Tank cap.
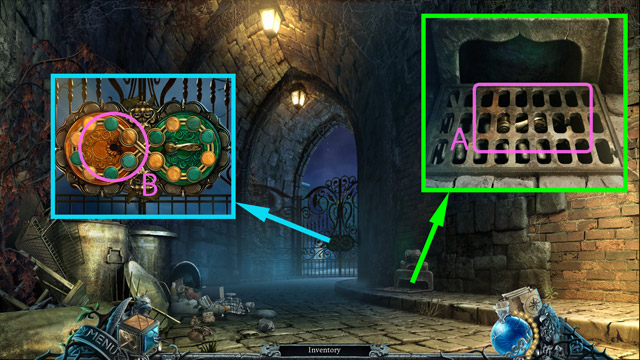
- Break the glass (A) with the Emergency hammer.
- Pick up the Key from the exposition (B) and the Wick (C).
- Pick up the Chalk (D).
- Go to the cell.
- Use the Key from the exposition to open the padlock (A).
- Then pick up the Chain and padlock (B).
- Use the Chalk on the riddles (C).
- Play the minigame.
- Reward is a Stones with signs.
- Go to the hall.
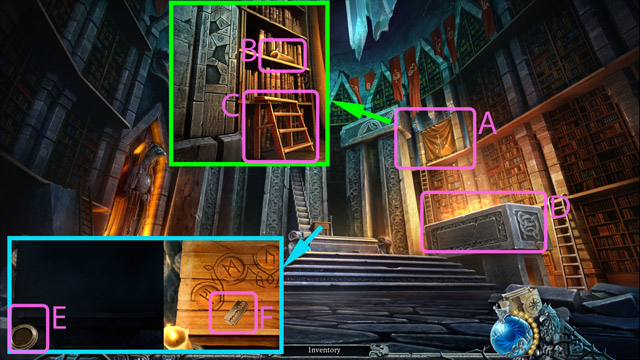
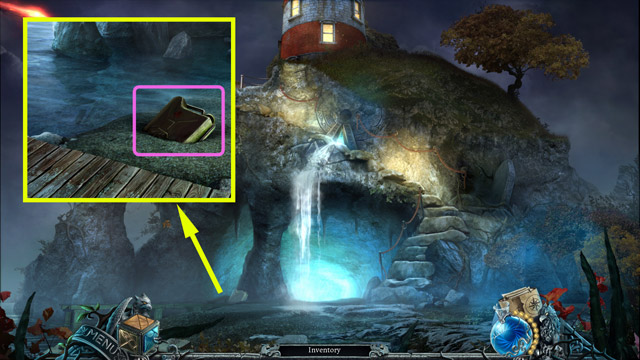
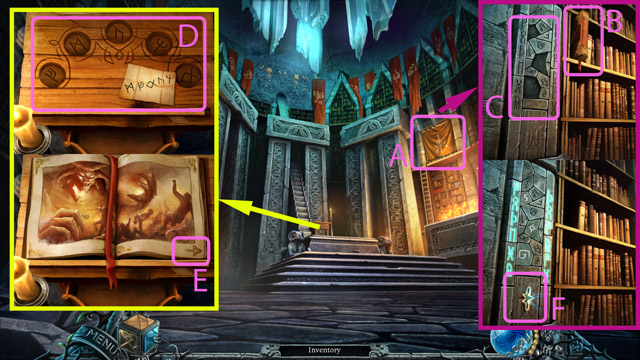
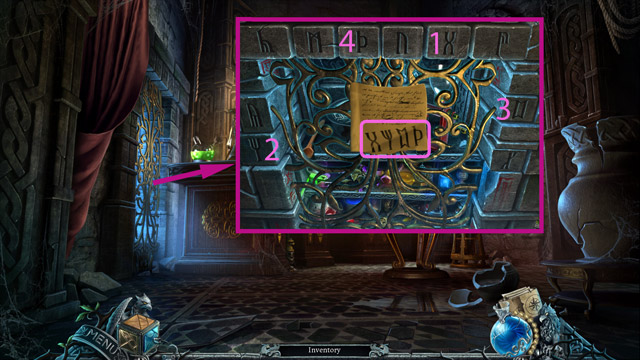
- Uncover the bookshelves, again (A).
- Pick up the Old book (B).
- Insert the Stones with signs into the holes on the wall (C).
- Place the Old book on the lectern (D).
- Turn the page (E) and then read the note.
- Underneath the note is the Ancient key. Pick it up.
- Open the safe (F) with the Ancient key, then pick up the Red crystal and the Old lighter.
- In the lighthouse use the Chain and padlock on the chain and weight to attach the weight.
- Go upstairs.
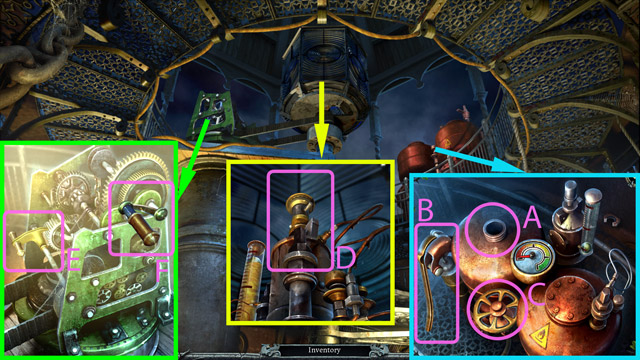
- Pour fuel from the Fuel can into the opening in the tank (A).
- Then place the Tank cap on the tank (A).
- Press the handle (B) three times to inflate the tanks.
- Turn on the tap (C).
- Put the Wick in the burner (D).
- Light up the wick (D) using the Old lighter.
- Release the lock (E).
- Turn on the mechanism (F).

- Unfortunately, the mechanism broke down. You'll have to fix it.
- Play the minigame.
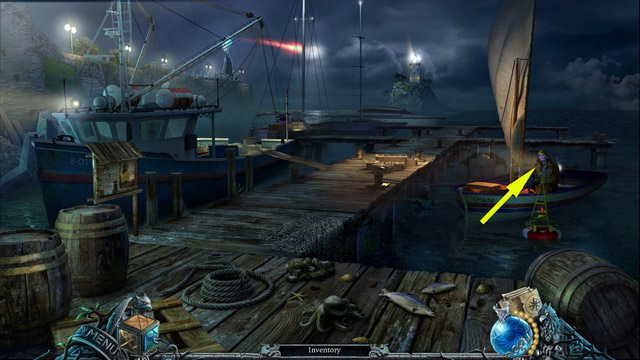
- Travel to Avalon with the Fisherman.
Chapter 4: Avalon
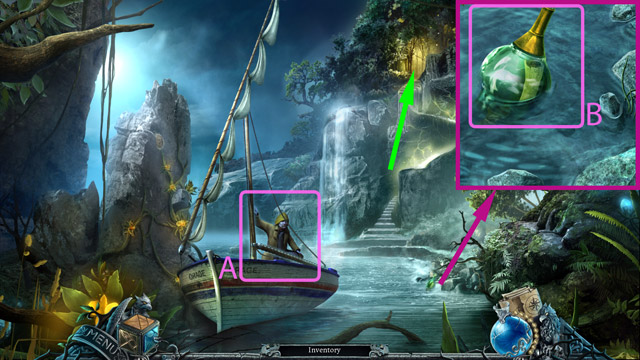
- First, talk to the Fisherman (A).
- Read the message in the Bottle and take it (B).
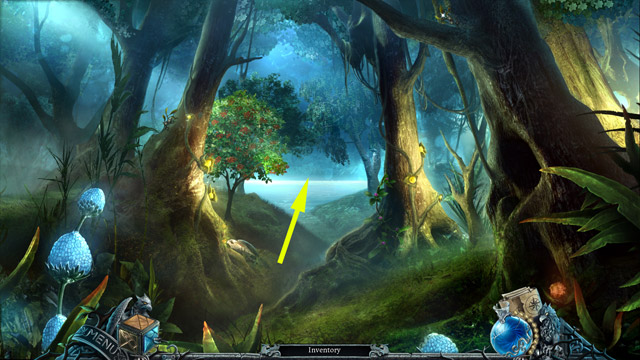
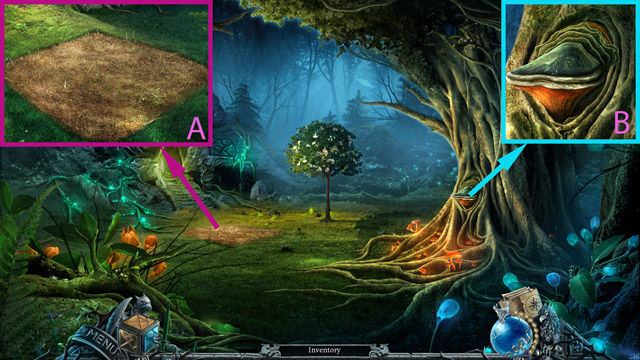
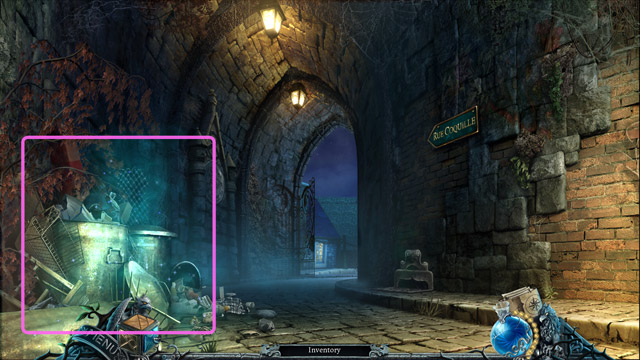
- Go into the forest.
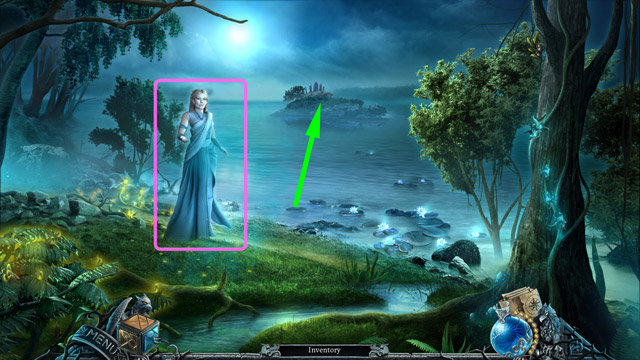
- Go straight to meet the Lady Of The Lake.
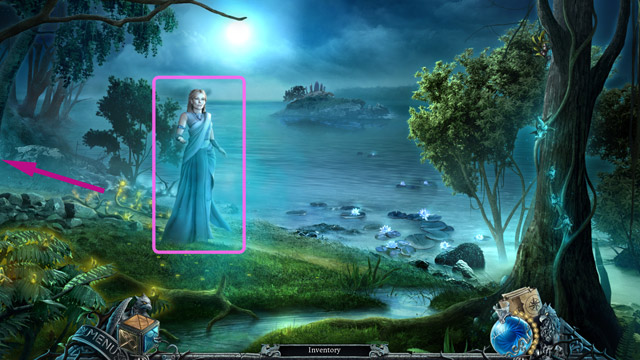
- Talk to the Lady Of The Lake.
- Follow the road to the left.

- Go inside the cave.

- Talk to the Hermit (A). He will ask you to heal the falcon.
- Look at the roots on the top (B) and pick up the Potion of growth, the Device and the Pouch with seeds.
- Uncover the curtain (C) and go inside the cave.
- Pick up the Watering can (A).
- Use the Watering can to water the withered flower (B).
- Pick up the Bird wing (C).
- Move the basket (D) and pick up the Rope.
- Insert the Rope into the mechanism on the wall (E) and then use it.
- Put the Bird wing on the bird (F).
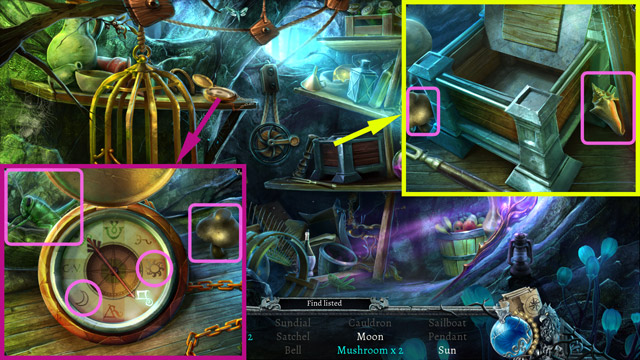
- Pick up the Compass key (A).
- Pick up the Compass needle (B).
- Open the compass cover with the Compass key (C).
- Insert the Compass needle into the compass (C). It will show a three symbol sequence.
- Pick up the Right tree part (D).
- Pick up the Left tree part (E).
- Touch the buttons to set the correct sequence of symbols (F) and then open the chest.
- Pick up the Crystal from the opened chest.
- Put the Crystal on the rod (A). Then you can pick up the White bloomed flower.
- Insert the White bloomed flower into the black vase (C).
- Swap the flowers so that their colors match the colors of their pots.
- When the safe is opened, insert the Right tree part and the Left tree part there.
- Then pick up the Hoe.
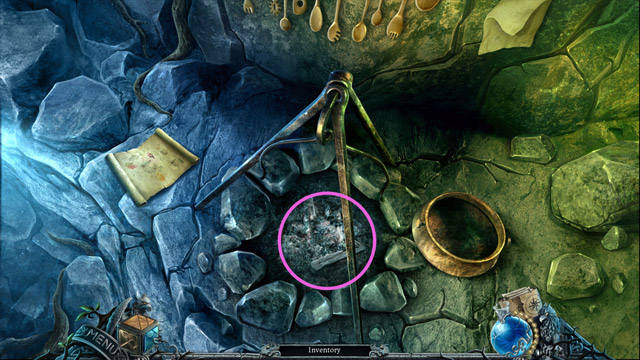
- Look at the fireplace.
- First, there is the healing potion recipe and instructions on using the potion of growth.
- Take the wood (A) and place it in the fireplace (B).
- Take the pot (C) and also hang it above the fire (B).
- Pick up the Horn pickaxe (D).
- Pick up the Jug (E).
- Play the minigame (F). Reward is a Spoon.
- Go back to the clearing.
- Use the Hoe on the patch (A).
- Then sow the seeds from the Pouch with seeds on the plowed patch (A).
- Finally use the Potion of growth on the sown patch (A) and then pick up the Sprouts.
- Use the Horn pickaxe to tear off the Tree mushroom from the tree (B).
- Insert the Device into the just uncovered tree mechanism and play the minigame.
- After the minigame pick up the Sickle.
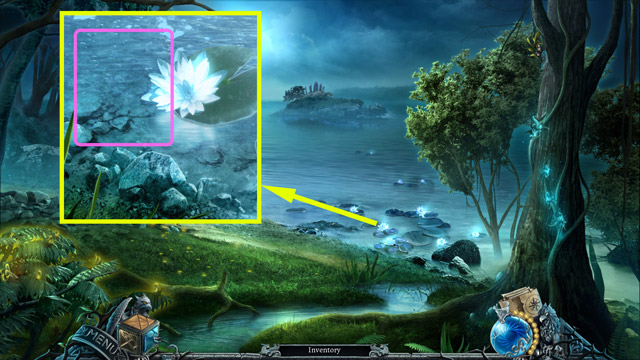
- Go to the lake.
- Look at the lake shore and fill the Jug to obtain the Jug of water.
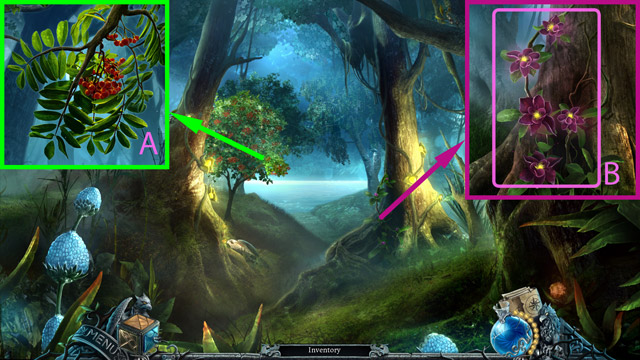
- In the forest cut the Rowan branch (A) with the Sickle.
- Pick up the Blooming flowers (B).

- Now you have all the ingredients for the potion, so go to the fireplace.
- Pour water from the Jug of water (A) into the pot.
- Put Sprouts, the Tree mushroom, the Rowan branch and the Blooming flowers (B) into the pot.
- Stir it with the Spoon (C)
- Fill the Bottle with the potion from the pot (D) and take the Healing potion.
- Heal the falcon using the Healing potion.
- Then go back to the lake.
- Talk with the Lady Of The Lake.
- Cross the lake in the boat.
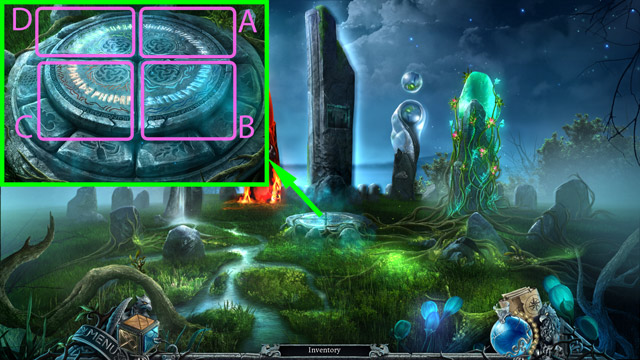
- Play the minigame to learn the runic language.
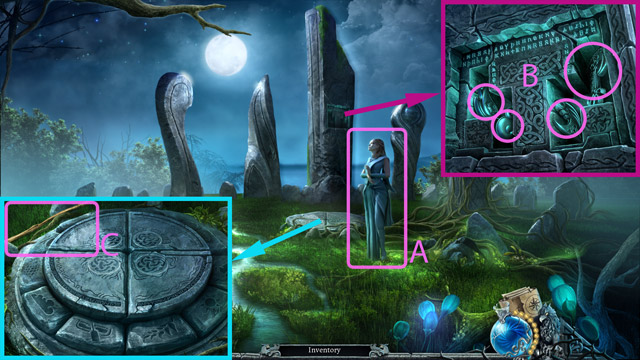
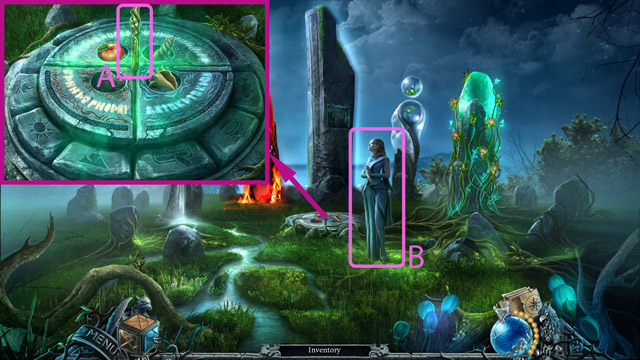
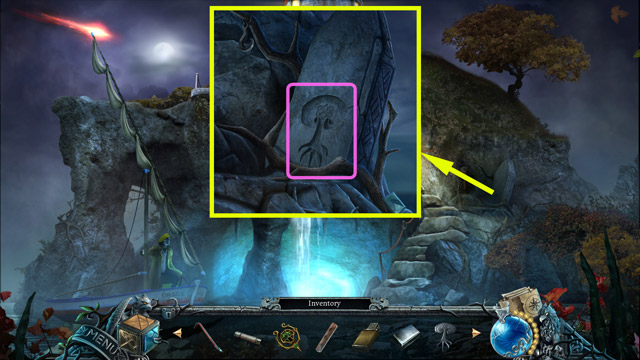
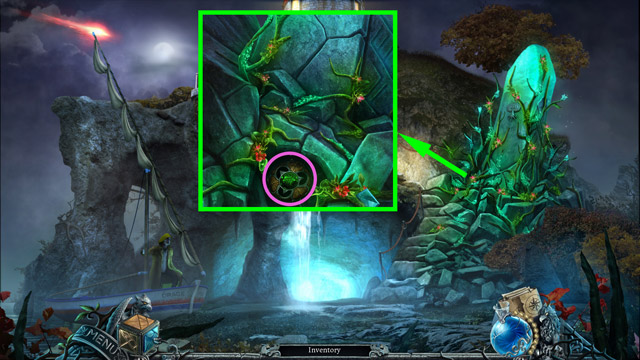
- Talk to the Lady Of The Lake (A). You have to activate the altar.
- Pick up all four elemental sigils (B).
- Insert each sigil into its place on the right menhir.
- Pick up the Long stick (C).
- Go to the shore.
- Move the nest with the Long stick.
- Pick up the Falcon's Feather which just landed on the nest.
- Go to the clearing.
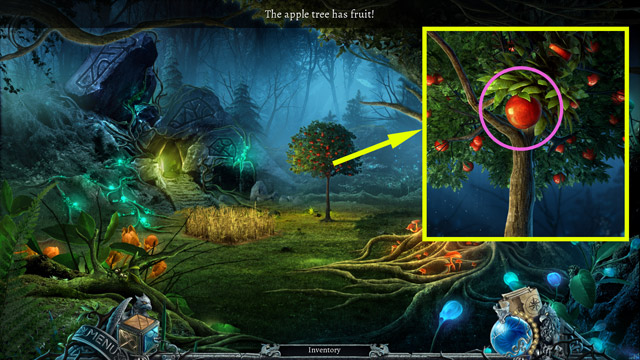
- Take the Apple from the tree. Oops, the branch broke.
- Go to the hermitage and again go to the cave.
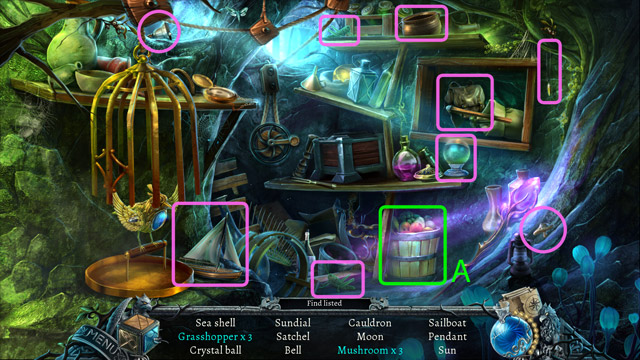
- Pick up all marked items.
- Move the basket (A) to pick up the Sundial.
- Pick up the rest of the marked items.
- The revard is the Sea shell.
- Pick up Ash from the fireplace.
- Go back to the island.
- Place the Feather on the air section of the altar (A).
- Place the Sea shell on the water section of the altar (B).
- Place the Ash on the fire section of the altar (C).
- Place the Apple on the earth section of the altar (D).
- Play the minigame.
- Pick up the Earth wand (A).
- Talk to the Lady Of The Lake (B).

- Use the Earth wand to fix the broken branch.
- Talk to the Fisherman and go back to the port.
Chapter 5: The man with the pendant
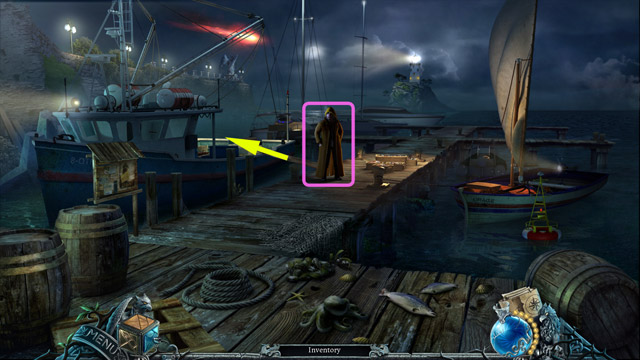
- Talk to the Fisherman.
- The boat has appeared in the port. Go there.
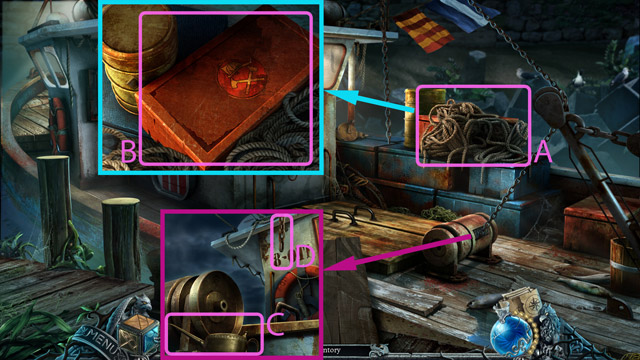
- Play the minigame (A).
- Open the box (B) and take the Fireaxe and the Hook from it.
- Pick up the Oiler (C).
- Hang the Hook on the chain (D).
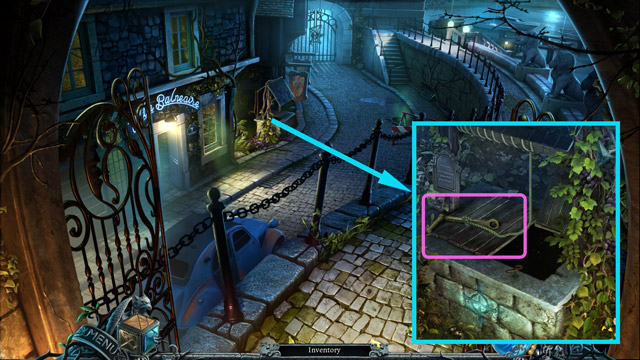
- Go to the street.
- Cut off the rope with the Fireaxe and pick up the Crank.
- On the boat put the Crank in the mechanism (A) and then turn it to open the lid.
- Go uder the deck (B).

- Pick up all marked items.
- Take the handle (A), mount it on the drawer (B) and open it.
- Move the cardboard box (C) and open the safe under it.
- Pick up the rest of the marked items.
- Your reward is a Lock wheel.
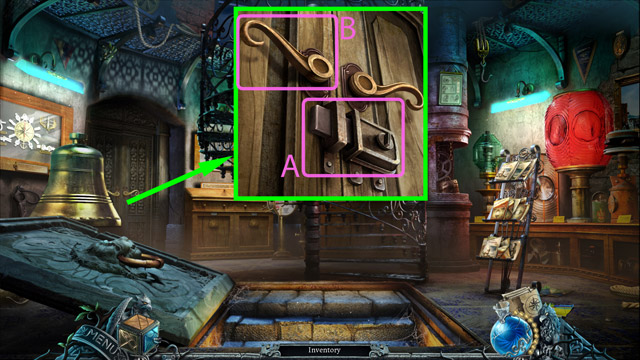
- Place the Lock wheel on the door (A) then turn it.
- Turn the second wheel (B).
- Look at the opened room and examine the body (C).
- Pick up the Captain's Key (E).
- Open the safety box (D) and pick up the Seahorse symbol and the Crowbar.
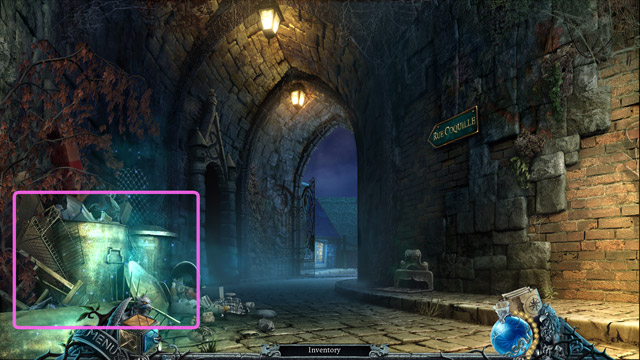
- Go to the alley and look at the trash.

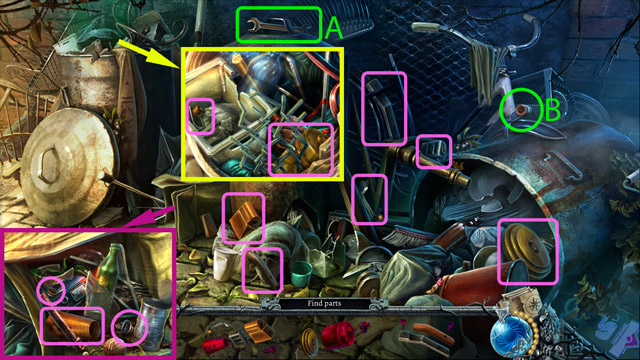
- Collect all marked items.
- Take the doll's head (A) and put it on the doll's body (B) then pick up the doll.
- Take the stone (C) and use it to break the jar (D) then pick up the clothes peg.
- Take the handset (E), place it on the phone (F) and take it.
- Open the cardboard box (G).
- Collect the rest of the marked items.
- The reward is a Poker.
- Use the Captain's Key to open the door then go inside.
- Look at the pub's owner (A). He's dead!
- Read the note (B) and pay attention to the drawing there.
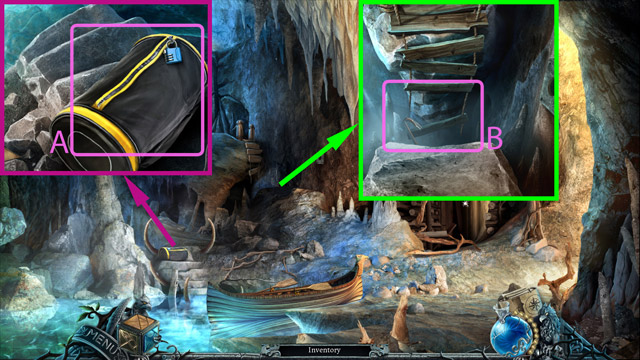
- Pick up the Fuse (C).
- Pick up the Wire cutter (D).
- Go inside the storage (E).

- Collect all marked items.
- Move the chair (A) to pick up the moth behind it.
- Close the cabinet door (B) to pick up the second moth.
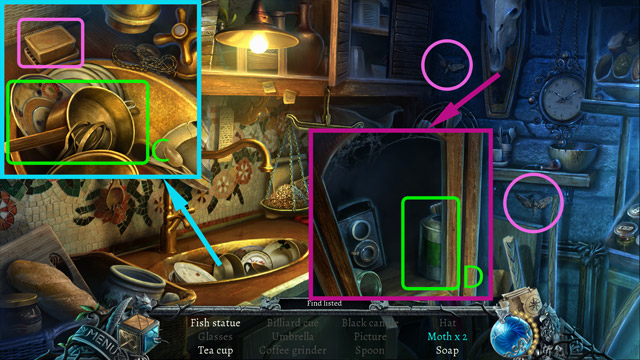
- Move the saucepan (C) to uncover the tea cup and then pick up it.
- Move the can (D) to pick up the Fish statue. It is your reward.
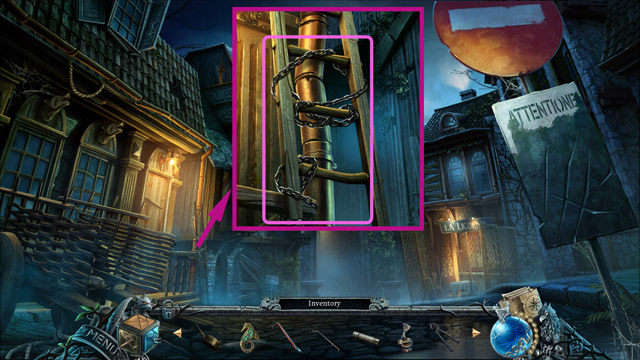
- Cut the chain with the Wire cutter and pick up the Ladder.
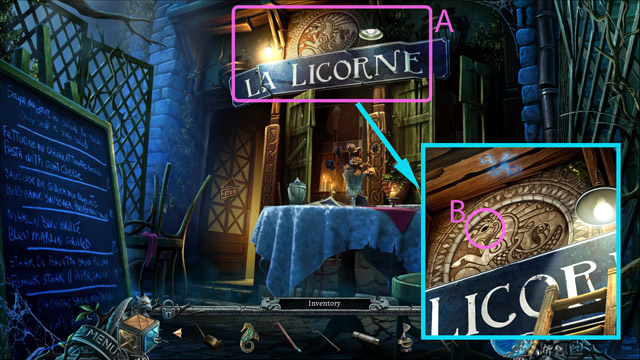
- Place the Ladder under the sign with the pub's logo.
- Then put the Red crystal in the eye hole (B). Pick up the Emblem.
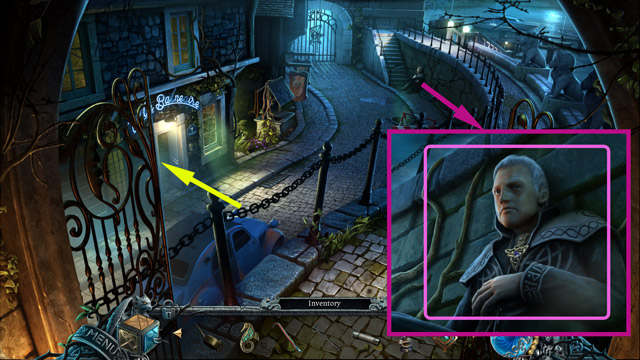
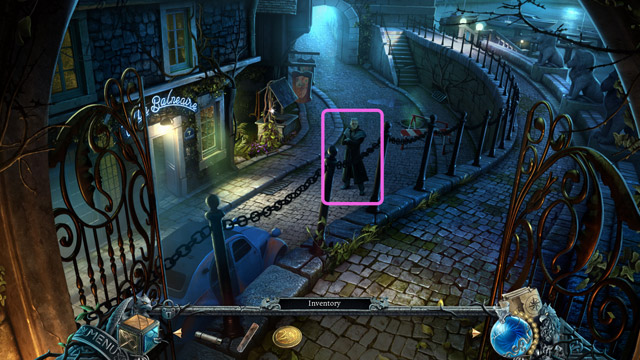
- Go back to the street.
- After witnessing the fight, talk with the man. He gives you the Silver bar.
- Then go inside Villa Balneaire.
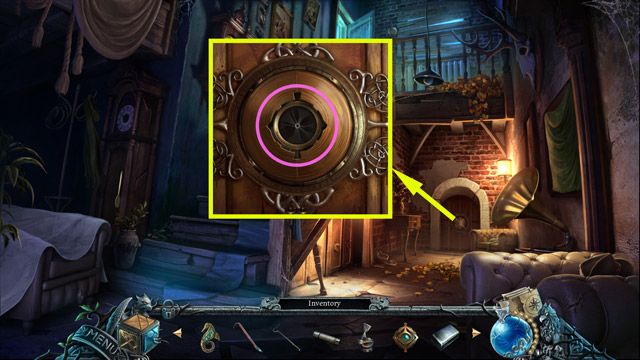
- Look at the door and put the Emblem into the slot.
- Play the minigame.
- Go into the opened entrance.

- Pick up the Skull artifact (A).
- Open the stove door (B).
- Use the Poker to poke the ash (C) inside the stove and then pick up the Fire statue.
- Pick up the Bird statue and the Vintage key from the shelf (D).
- Pick up the Test tube (E).
- Turn the book page (F) and then pick up the Triangular key.
- Uncover the keyhole lid.
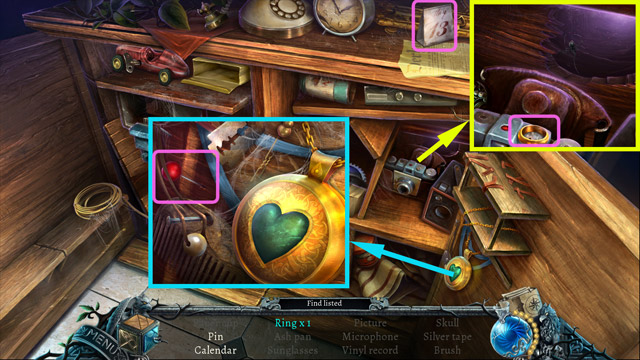
- Open the cupboard using the Vintage key then look at it.

- Pick up the Dust cleaner (A).
- Move the clock (B) and pick up the Cutter behind.
- Cut the strips (C) with the Cutter and pick up the Pry bar.
- Open the cupboard door (D) prying the latch with the Pry bar.
- Pick up the Heart (E).
- Insert the Heart into the pendant (F) and when it is opened pick up the Wheels (G).
- Clean the dust (A) with the Dust cleaner.
- Pick up the Valve (B).
- Instal the Valve on the pipe (C) and turn it.
- Then you can pick up the Magnet (D).
- Use the Magnet to pull out the Toy key (E) and pick it up.
- Insert the Toy key into the toy car (F).
- Mount the Wheels on the toy car (F).
- Move the toy car (F) and then open the cardboard box and pick up the Vise handle.
- Put the Vise handle into the vise (G) and turn it. Then pick up the Wrench which is your reward.
- Go to the basement.
- Use the Wrench to unscrew the screw (A).
- Pick up the Tree statue (B).
- Place the Fish statue on the water podium (C).
- Place the Tree statue on the earth podium (D).
- Place the Fire statue on the fire podium (E).
- Place the Bird statue on the air podium (F).
- Play the minigame.
- Go inside the secret passage behind the shelves.
- Look at the hook on the wall.
- Remove the cobwebs and pick up the Lighter.
- It is time to head back to the island.
- Go to the lighthouse and put the Seahorse symbol in the seahorse shape in the cupboard door.
- When it's opened, pick up the Empty bucket.

- Go to the cell.
- Use the Triangular key to open the stone safe (A) and pick up your second Silver bar.
- Look at the cage to open a hidden object scene.
- Pick up all marked items.
- Your reward are Tongs.
- Fill the Empty bucket with the water from the lake to have the Full bucket.

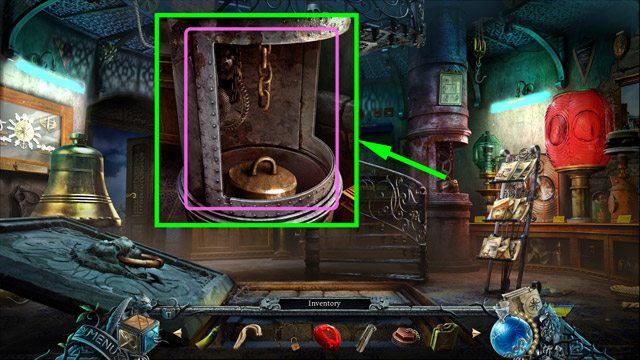
- Attach the Tongs to the melting pot (A).
- Put the Silver bar into the melting pot (B).
- Press the bellows (C) three times to melt the silver.
- Take the pot with the tongs and pour the liquid silver into the tree mould (D).
- Pour the water from the Full bucket over the hot earth sigil (D).
- Pick up the Earth sigil.
- Go to the shore and insert the Earth sigil into the Menhir.
Chapter 6: The power of the menhirs
- Pick up the Earth artifact.
- Put the Earth artifact into the stone plaque.
- Pick up the Wave-shaped mold.
- Now you can create another sigil.
- Place the Wave-shaped mold on an empty stand (A).
- Put the Silver bar in the melting pot (B).
- Press the bellows (C) three times to melt the silver.
- Take the pot with the tongs and pour the liquid silver into the wave mould (A).
- Take the bucket of water (D) and pour the water over the hot wave sigil (A).
- Pick up the Water sigil.
- Get back to the port and go to the street.
- The gate is now opened. Go there.
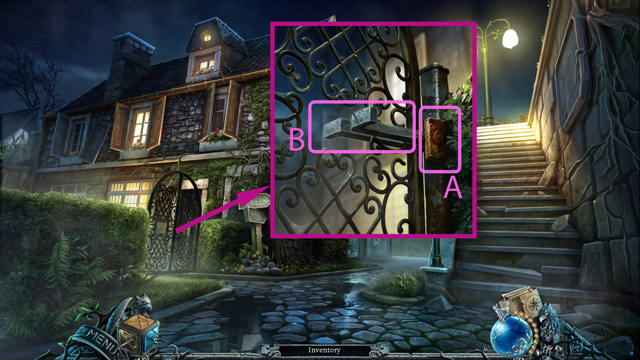
- Use the Oiler to oil the rusty lock (A).
- Then press the handle (B) to open the gate.
- Go to the backyard.
- Pick up all marked items.
- Remove the loose stone (A) to pick up one of the hidden pieces.
- Take the tongs (B) and use them to take out the tray (C) from the fireplace. There is an another hidden piece.
- The last piece is inside the lamp. Open it (D) to pick up the wick.
- The reward is an Empty kerosene lamp.

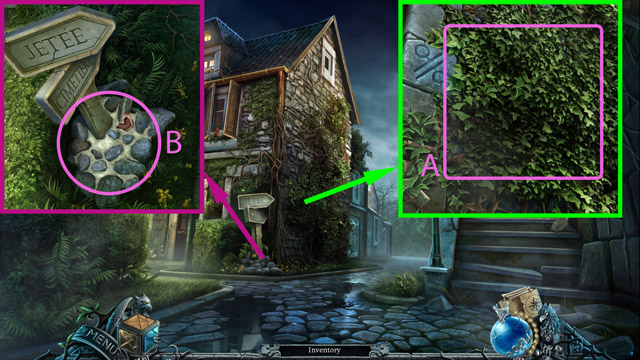
- Follow the road to the back.
- Pick up the Garden shears (A) and the Long stick (B).
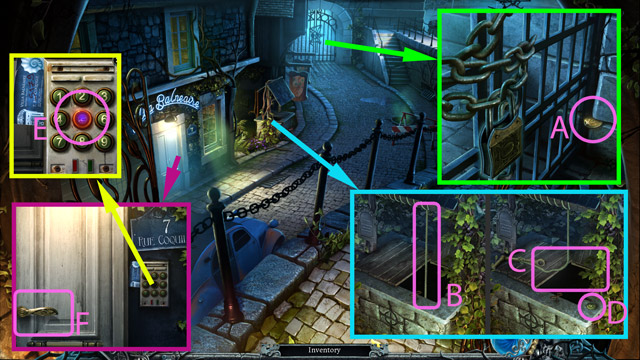
- Put the Skull artifact in the gate lock (C) and rotate it.
- Then press the handle (D).
- Go to the cemetery.
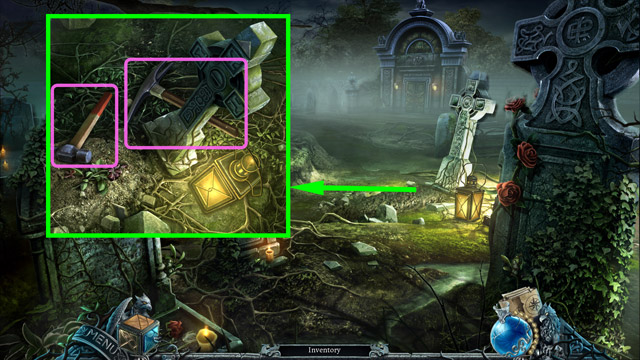
- Pick up the Sledgehammer and the Pickaxe.
- Go back to the outskirts.
- Cut the ivy (A) with the Garden shears.
- Smash the concrete (B) with the Sledgehammer and then pick up the first Broken stone piece.

- Go to the boat and pry the barrel lid with the Crowbar.
- Then fill the Empty kerosene lamp with kerosene to get the Kerosene lamp.
- Again, get to the island and smash the wall with the Pickaxe.
- Pick up the second Broken stone piece
- Go back to the outskirts and go up the stairs.
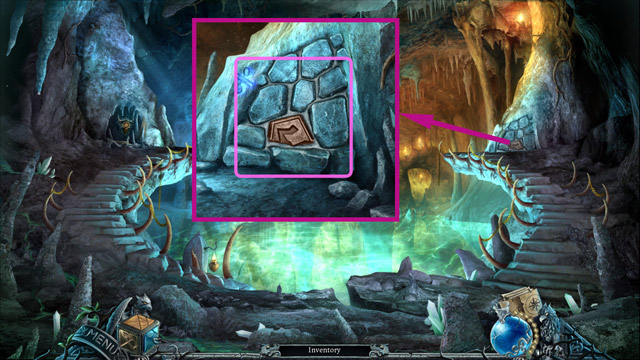
- Put the two Broken stone pieces into the hole in the wall (A).
- It will uncover the wave shaped slot, so put the Water sigil there.
- Pick up all marked items (B): the Iron steps, the Brass moon and the Water artifact.
- Go down to the sewers.
- Hang the Kerosene lamp on the hook and light it with the Lighter.
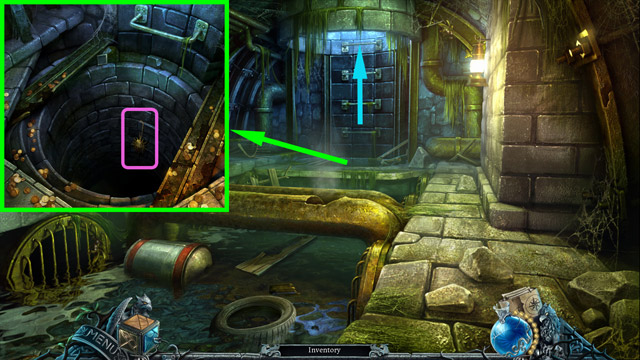
- Look at the well.
- Reach the Brass sun with the Long stick.
- After that go to the well shaft.
- First, try going to the top (A).
- Repair broken ladder (B) with the Iron steps.
- Then play the minigame (C).
- Pick up the Eagle's head (D).

- Go to the outskirts.
- Inset the Brass moon and the Brass sun into the wall.
- Play the minigame.
- After winning, pick up your next Silver bar.
- Go to the island's shore.
- Put the Water artifact in the place above the spring (A).
- Then pick up the Cloud-shaped mold.

- It is time to cast the third sigil.
- Place the Cloud-shaped mold on the empty stands (A).
- Put the Silver bar in the melting pot (B).
- Press the bellows (C) three times to melt the silver.
- Take the pot with the tongs and pour the liquid silver into the cloud mould (A).
- Take the bucket of water (D) and pour the water over the hot cloud sigil (A).
- Pick up the Cloud sigil.

- Go to the cemetery.
- Put the Eagle's head on the headless eagle statue (A).
- After that play the minigame (B).
- Put the Cloud sigil in the cloud shaped place (C) on the menhir.
Chapter 7: Shadow of the moon
- You are trapped again.
- Pick up Matches (A).
- Use Matches to light the candles (B).
- Play the minigame with skulls (C).
- Look at the coffins to the right (D).
- Pick up the Wooden handle (A).
- Insert the Wooden handle into the stone (B) and pick up the Mallet.
- Smash the cracked wall (C) with the Mallet.
- Pick up the Iron bar (D).
- Pry the coffin cover (E) with the Iron bar.
- Move the shield (F).
- Touch the pile of skulls (G).
- Pick up the Shackles key (A).
- Open the shackles (B) with the Shackles key and then pick up the Rusty blade.
- Press the lever (C).
- Remove the cobwebs (D) from the Axe and pick it up.
- Break the planks (E) with the Axe.
- Cut off the Star (F) with the Rusty blade and pick it up.
- Insert the Star to the star-shaped lock on the chest (A).
- Open the chest's lid (B).
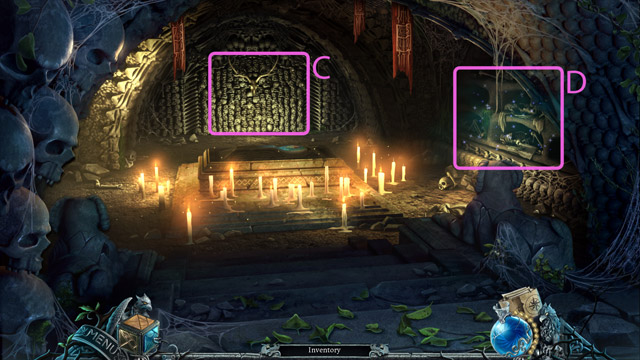
- Pick up the Head (C).
- Pick up the Triple spiral (D).
- Put the Triple spiral in the wooden mask (E).
- Put the Head in the empty place (F).
- Pick up the Skull key (G). It is your reward.
- Get out of the crypt.
- Pick up the Coin (A) one more time.
- Insert the Skull key to the wall (B).
- Play the minigame.
- Get out of the dungeon.
- Climb up the well shaft to reach the street.
- Talk with the man. He gives you All mosaic pieces if you haven't collected them by yourself.
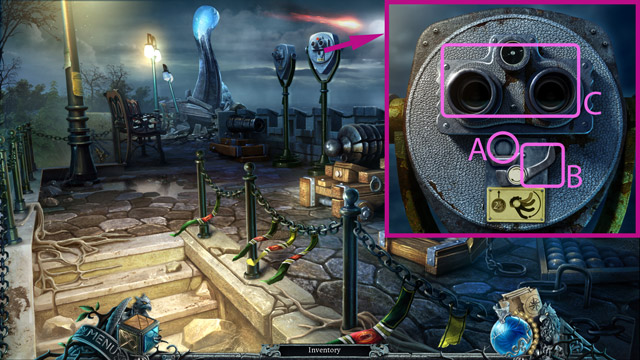
- Go to the pier an look at the binoculars.
- Insert the Coin in the slot in the machine (A).
- Then press the handle (B).
- Play the minigame.
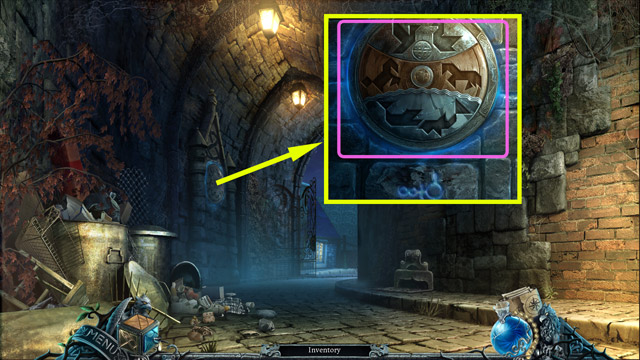
- Use the All mosaic pieces on the mosaic.
- Play the minigame.
- Go inside the secret passage.
- Pick up the Willow branch (A).
- Pick up the Flash drive (B).
- Go to the room and look at the notebook.
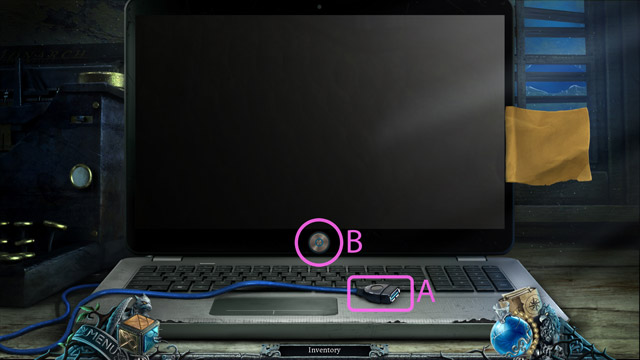
- Insert the Flash drive to the USB cable (A).
- Turn on the notebook (B).

- Insert the right code (C).
- Then press the submit button (D).
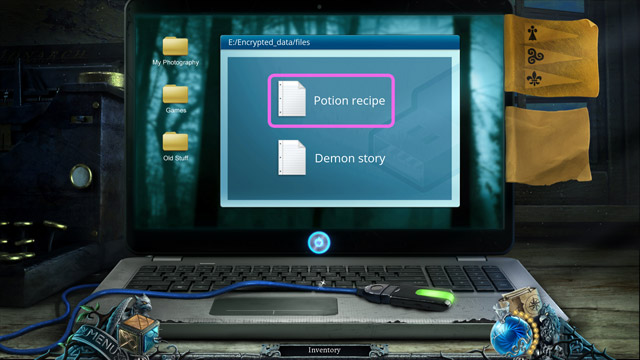
- Read the potion recipe. You'll have to make it soon.
- Look at the cupboard.

- Pick up all marked items.
- Move the clock (A) to pick up the calendar.
- Close the pendant lid (B) to pick up the pin.
- Pick up the rest of the marked items.
- Your reward is an Ash pan.
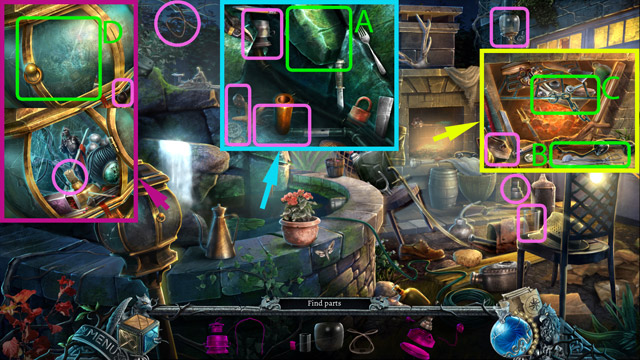
- Go to the alley and look at the trash.
- Again pick up all marked items.
- Use the wrench (A) to unscrew the screw (B) and pick it up.
- Reward is a Blow torch.
- Go to the boat and go down under the deck.
- Pick up all marked items.
- Close the drawer (A) to pick up the flashlight.
- Pick up the rest of the marked objects.
- The reward are the Pincers.
- Remove the nails in the chest with the Pincers to pick up the Compass rose.
- Go to the cemetery and remove the beam. Then open the door and go inside the crypt.

- Look at the coffins on the right.
- First, pick up all marked items.
- Switch the lever (A).
- Move the shield (B).
- Close the chest (C).
- Pick up the rest of the hidden objects.
- Your reward are Black candles.
- Insert the Compass rose to the compass rose shape (A) on the lid of the coffin.
- Play the minigame.
- When it is opened, pick up the Silver gryphon.
- Pick up the Archdruid's ring and then the Archdruid's relic.
- Read the scroll too (this is important).
- Go to the outskirts backyard.
- Pick up all the marked items.
- Pick up the rest of items.
- Reward is a Spade.
- Dig a hole with the Spade under the tree (A). Important: make sure you've read the scroll at the archdruid's coffin, 4 steps above, otherwise the action will be not available.
- Look at the mystery box.
- Insert the Silver gryphon into the mystery box then pick up the Emblem and the Myrtle leaves.
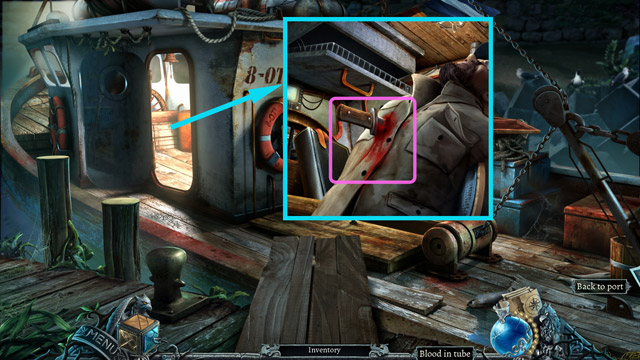
- Go to the boat and use the Test tube on the blood to get the Blood in the tube.
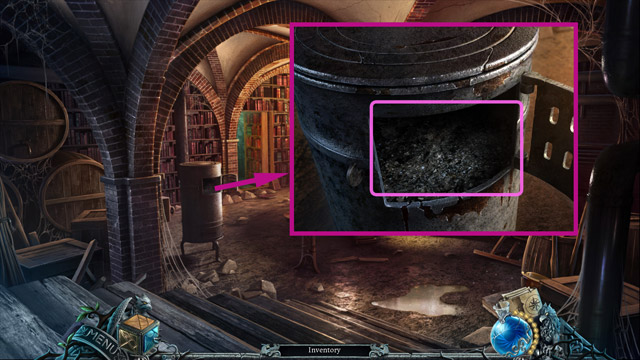
- In the basement get some ash onto the pan to get the Pan with the ash.
- Look at the purse in front of the pub.
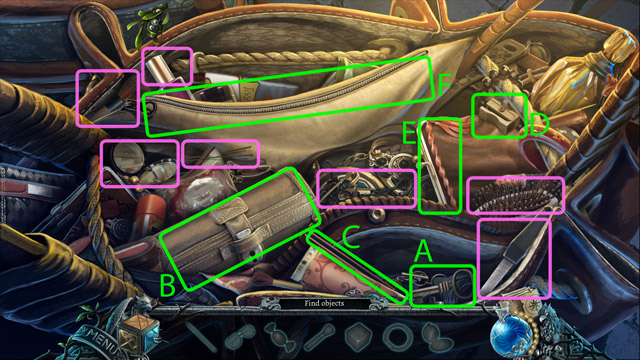
- Pick up all marked items.
- Use the key (A) to open the case (B) and then pick up the sunglasses.
- Use the pencil (C) on the sharpener (D) to get the sharpened pencil.
- Open the wallet (E) and pick up the hair rubber.
- Open the zipper (F) and pick up the dice and the candy.
- Pick up the rest of the marked items.
- Your reward is a Nail file.
- Go inside the pub.
- Put the Archdruid's relic in the machine (A).
- Remove the lid (B) using the Nail file (B).
- Plug the plug in (C).
- Remove the old broken fuse (D) and insert there the new Fuse.
- Turn on the grinder (E).
- Pick up the Relic powder (F).
- Back to the secret laboratory.
- Press stones around the niche in the right order.

- Pick up the Vervain flower (A).
- Put the Vervain flower into the oil press (B).
- Squeeze the oil from the vervain by rotating the handle (C),
- Pick up the Vervain oil (D),
- Add the following ingredients to the pot (E): the Relic powder, the Pan with the ash, the Blood in the tube and the Vervain oil.
- Stir the potion with the spoon (F).
- Pick up the Potion of dominion.

- To make the Wand of Dominion follow the recipe from the book:
- Place the Black candles on the table (A).
- Light the candles with the Blow torch (B).
- Add the Myrtle leaves to the fire (C).
- Put the Willow branch in the incenser (D).
- Pour the Potion of dominion onto the branch (E).
- Pick up the Wand of Dominion.
- Now the Fisherman will take you to the island for the last time.
- Go inside the cave.
- Put the Emblem in the hole.

- Go down the lake.
- Defeat Michael using the Wand of Dominion.
- Pick up the both of the moonstones.
- Follow Michael.
- Follow Michael.

